
I run a fairly deep Home Assistant setup, and until recently my Samsung fridge and washer showed up in it through the official SmartThings cloud integration. That worked fine, right up until Samsung announced that non-commercial SmartThings API access moves behind a 4.99 dollar per month paywall starting October 2026 (free through Q3). For two appliances, paying a subscription just to keep two sensors alive in Home Assistant never sat right with me, so I went looking for a local, cloud-free alternative.
What I found is a genuinely local CoAP-DTLS control path into newer-generation Samsung appliances, built on two community projects: the low-level smartthings-local protocol library, and LocalThings, a native Home Assistant custom integration built on top of it. Both my fridge and washer turned out to be compatible, and I now control both entirely over my own LAN, with zero cloud round-trip and zero subscription. This post is the full, exact process I used, including every command, so it can serve as a step-by-step manual for anyone else on the same firmware family.
How this works, in short
Newer-generation Samsung appliances (Tizen RT 3.x, DAWIT 3.0 firmware and up) run a local CoAP-over-DTLS server on the LAN alongside their normal cloud connection. Samsung’s own factory access control grants full read and write permissions to a specific identity, one that is identifiable straight out of Samsung’s own public cloud TLS certificate. The intermediate CA that signs client certs for that identity, called AC14K_M, has been publicly known for years and is still trusted by current firmware.
The smartthings-local project uses this to mint a client certificate that authenticates directly to the appliance over the LAN. LocalThings wraps that into a proper Home Assistant integration with a normal config flow: add a device, paste in the CA credentials once, and it detects the appliance type and wires up entities automatically.
This is not an official or sanctioned API. It works because of how Samsung’s device identity and ACL system is structured, not because Samsung intended third parties to use it this way. I am documenting it because it is genuinely useful for my own hardware on my own network, not as an invitation to poke at devices that are not yours.
Prerequisites
- A Samsung fridge or washer on Tizen RT 3.x / DAWIT 3.0-family firmware, connected to your LAN over WiFi
- A Proxmox VE host (I run everything from my NUC at 192.168.1.14) with shell access
- Home Assistant with HACS installed
- Basic comfort with the Linux command line
Getting a shell on Proxmox
Everything in this guide runs from a root shell on my Proxmox host, not inside a container or VM. If you are not already SSH’d in, the Proxmox web UI has a shell built in: select your node in the left-hand tree, then click the >_ Shell button in the top right corner. That drops you straight into an xterm.js session running as root on the host. Alternatively, plain SSH works the same way:
ssh root@192.168.1.14
Either route gets you to the same place. From here on, every command in this post runs on the Proxmox host itself.
Step 1: Check appliance compatibility
Before installing anything, it is worth confirming your appliance actually speaks the newer local protocol. Newer firmware exposes a DTLS-CoAP responder somewhere in the UDP port range 49152 to 49160. Older firmware (roughly 2018 to 2022) only exposes a token-based HTTPS service on port 8888 and is not supported by this method.
Run an nmap UDP scan against the appliance’s IP. Find the IP from your router or, cleaner, from your UniFi controller’s client list:
nmap -Pn -sU -p 49152-49160 192.168.1.32
For my fridge this came back with the hostname resolved automatically and one port genuinely open:
Nmap scan report for Samsung-Refrigerator.localdomain (192.168.1.32)
Host is up (0.39s latency).

PORT      STATE          SERVICE
49152/udp closed         unknown
49153/udp open|filtered  unknown
49154/udp open           unknown
49155/udp closed         unknown
...
A clean open state (not just open|filtered) on one port is a strong signal. My washer was messier, three ports all reported open|filtered with no clear winner:
Nmap scan report for Samsung-Washer.localdomain (192.168.1.22)
Host is up (0.061s latency).

PORT      STATE          SERVICE
49152/udp closed         unknown
49153/udp open|filtered  unknown
49154/udp open|filtered  unknown
49155/udp open|filtered  unknown
...
UDP scanning is inherently ambiguous this way. nmap cannot always tell a real DTLS service from silence without attempting an actual handshake, so open|filtered on several ports at once is not a failure, it just means the real test comes later. Also worth knowing: if the appliance has been idle for a while it may drop off the network entirely between cycles to save power. If a scan comes back with zero hosts up, try waking the appliance (touch the panel, or start configuring a cycle without pressing start) and rescan a minute or two later.
Step 2: Install git and Python venv support
My Proxmox host did not have git or a working python3-venv module installed by default. Debian’s system Python is externally managed under PEP 668, so packages need to go into a virtual environment rather than being installed system-wide:
apt install -y git
apt install -y python3.13-venv
Then create and activate a dedicated virtual environment for this project:
python3 -m venv ~/localthings-venv
source ~/localthings-venv/bin/activate
Your prompt should now show a (localthings-venv) prefix. Every python and pip command from here on assumes this venv is active. If you open a new shell session later, remember to source the activate script again before continuing.
Step 3: Clone the protocol library and mint a certificate
The low-level DTLS/CoAP handling and the certificate minting script live in the smartthings-local repository, separate from the Home Assistant integration itself:
cd ~
git clone https://github.com/QuiteYellow/SmartThings-Local.git
cd SmartThings-Local
pip install -r requirements-bootstrap.txt
The included setup_cert.py script does four things in sequence: fetches the public AC14K_M signing CA bundle, opens a TLS connection to Samsung’s cloud gateway to read the identity UUID out of the server certificate’s subject line, generates a fresh key pair and signs a client certificate against that UUID using the AC14K_M CA, and optionally test-verifies the resulting cert against a real appliance.
Run it once with the test flag pointed at your first appliance:
TARGET_IP=192.168.1.32 python setup_cert.py --test
On a working device this produces output like:
============================================================
Phase 4: verify cert against target appliance
============================================================
[+] DTLS handshake to 192.168.1.32:49154...
    handshake OK in 1.19s
    GET /oic/sec/acl -> 2.05
    OK - cert accepted by the device ACL
  Cert is functional. Drop fullchain.pem + key into your bridge config.
A 2.05 response on /oic/sec/acl is the confirmation you want. That is the fridge done, confirmed compatible on port 49154.
If the handshake times out
My washer timed out on the default port 49154. The script supports a TARGET_PORT override, so given the three ambiguous ports the nmap scan turned up, I simply tried each in turn:
TARGET_IP=192.168.1.22 TARGET_PORT=49153 python setup_cert.py --test
TARGET_IP=192.168.1.22 TARGET_PORT=49155 python setup_cert.py --test
49153 also timed out, but 49155 answered immediately:
[+] DTLS handshake to 192.168.1.22:49155...
    handshake OK in 0.68s
    GET /oic/sec/acl -> 2.05
    OK - cert accepted by the device ACL
Washer confirmed compatible on port 49155. Every appliance can genuinely land on a different port within that range, so if the default fails, work through the candidates the nmap scan flagged rather than assuming incompatibility.
One useful thing worth knowing: setup_cert.py only needs to mint the CA-level material once. Running it again for a second appliance reuses the same AC14K_M bundle and UUID from Phases 1 and 2, so only Phase 4’s handshake target actually changes between runs.
Step 4: Extract the CA certificate and key
The Home Assistant integration’s config flow asks for the AC14K_M CA certificate and private key directly, not the per-device leaf cert setup_cert.py minted for testing. Those CA files live under certs/.bundle/ inside the SmartThings-Local directory. Print both and copy the full PEM blocks, including the BEGIN and END lines:
cd ~/SmartThings-Local
cat certs/.bundle/ac14k_m.pem
cat certs/.bundle/ac14k_m.key
This CA cert and key pair is not unique to your setup, it is the same publicly known intermediate CA the entire project is built around, fetched live from a public mirror. There is nothing device-identifying in it. Keep it reasonably private anyway since it is a real credential capable of authenticating to any compatible Samsung appliance it can reach, but it is not a secret tied to your specific hardware.
Step 5: Install the LocalThings integration
I installed LocalThings through HACS as a custom integration repository, pointing at github.com/mbillow/localthings. If you would rather install it manually, copy the custom_components/localthings folder from the repository straight into your Home Assistant config’s custom_components directory instead.
Either way, restart Home Assistant afterward so it picks up the new integration.
Step 6: Add each appliance in Home Assistant
With Home Assistant restarted:
- Go to Settings, then Devices and Services, then Add Integration, and search for LocalThings
- For the first device, enter the appliance’s IP address, then paste the CA Certificate PEM and CA Private Key PEM content from Step 4 into their respective fields
- Submit. The config flow fetches the UUID from Samsung’s cloud gateway itself, mints its own leaf certificate from the CA you provided, sweeps ports 49152 through 49160 to find the live DTLS port automatically, and confirms the device by reading /device/0
- On success it creates a config entry and detects the appliance type on its own, refrigerator or washer in my case
Add the second appliance the same way, through Add Integration, LocalThings again. Since the CA is already stored from the first device, it only asks for the new IP address this time, nothing else.
I added the fridge at 192.168.1.32 first, then the washer at 192.168.1.22. Both came up cleanly with entities appearing under their own device pages in Home Assistant, no manual port number needed anywhere in the UI since the config flow does its own discovery.
What you get once it is running
Both appliances now sit in Home Assistant fully locally, no SmartThings cloud account, no subscription, no API dependency. The LocalThings integration supports refrigerators, washers, dryers, ovens, and dishwashers as first-class registries, with device-type detection handled entirely on its side. A few things worth knowing about the result:
- State updates happen through a mix of push notifications (CoAP OBSERVE) when the appliance’s cloud link is active, and polling as a fallback that keeps working even if the appliance is offline from Samsung’s perspective
- Samsung’s firmware occasionally drops the DTLS session briefly. This is normal appliance-side behavior, the integration reconnects automatically and Home Assistant just holds the last known value for one poll cycle
- Not every write survives. Power and remote-control toggles on some models get accepted by the device then silently reverted a few seconds later, since those are hardware-mirrored settings rather than real remote-writable state
- If your appliance’s type is not fully modeled yet, Home Assistant surfaces a Repairs entry pointing at a redacted diagnostics download you can attach to an upstream GitHub issue
Some honest caveats
This is community reverse-engineering work built around a shared, long-lived certificate authority rather than a documented, sanctioned API. It has held up so far, the AC14K_M CA has reportedly been public for years and remains trusted by current firmware, and rotating it would require Samsung to re-issue certificates and push new ACLs across their entire fielded device base. But there is no guarantee it stays that way forever, and this is proof-of-concept-grade software, not a polished vendor product. I would not build critical automation logic on top of it without a fallback, and I only pointed it at appliances I own and rely on daily after confirming compatibility carefully first.
If you are dealing with the same October 2026 SmartThings pricing change and only care about a couple of major appliances rather than your whole device fleet, this is by far the more interesting path compared to paying a flat monthly fee just to keep a fridge sensor alive.
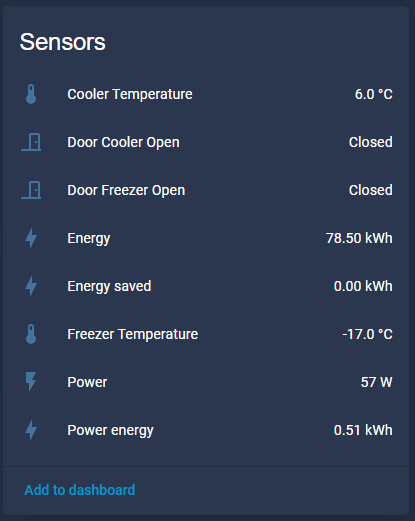
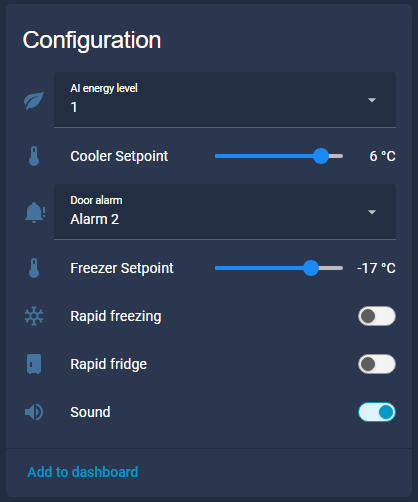
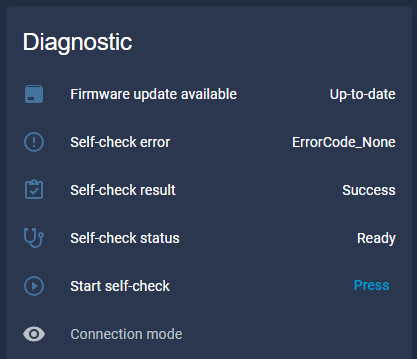
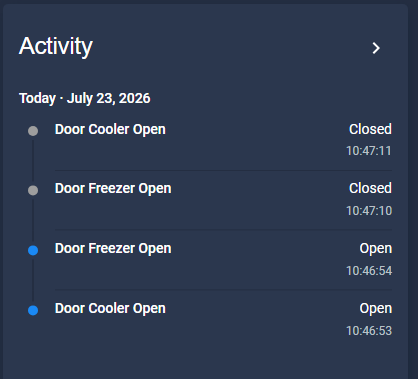
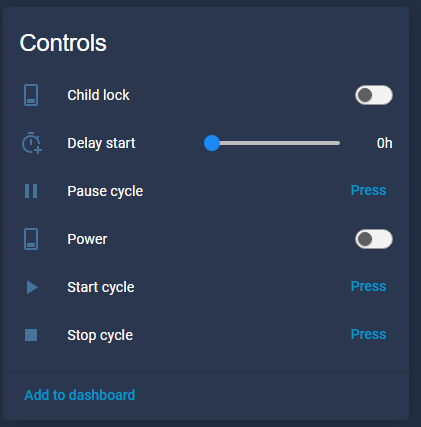
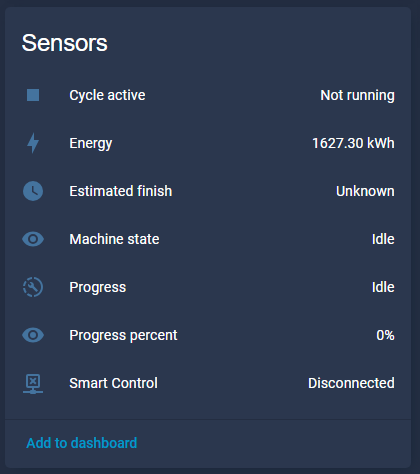
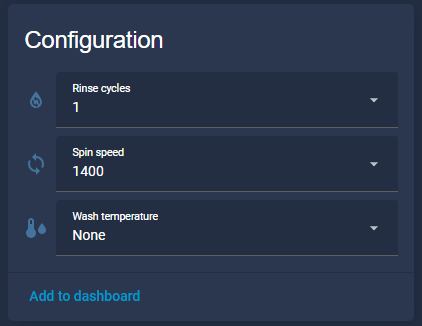
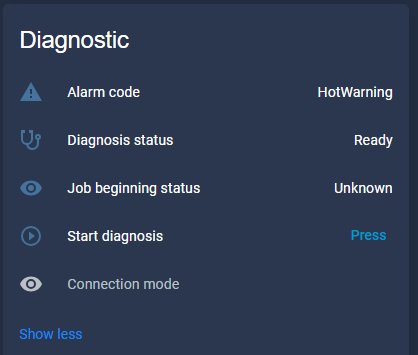
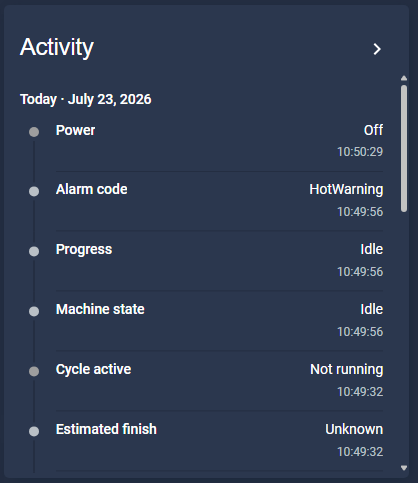
Screenshots from this integration:
Fridge:
Washer:

Hey! Just wanted to say thanks for putting this guide together. I tried it with my older Samsung washer and was honestly a little surprised that it worked, so I figured I’d pass along another compatibility data point.
My washer is a WF45R6300AW/US. It reports itself as DA_WM_A51_20_COMMON, with controller version WW(D).SC.0.493/2.0. It ended up answering on UDP 49155.
One weird thing I ran into: setup_cert.py –test timed out, which initially made it look like the washer wasn’t compatible. The newer stateless DTLS probe found port 49155, though, and an authenticated GET to /oic/sec/acl returned 2.05, so the earlier timeout was apparently a false negative.
I also couldn’t get the LocalThings setup flow to connect when I supplied only ac14k_m.pem and the key. It worked once I concatenated the complete cert_1.pem through cert_4.pem chain and used that as the CA certificate.
After that, LocalThings v0.21.0 loaded normally in Home Assistant and created 25 enabled local entities for things like power, Smart Control, machine state, cycle, temperature, spin speed, rinse count, progress, energy use, and the Start/Pause/Stop buttons. The local readings agreed with the existing SmartThings cloud entities, and both integrations have been able to stay installed at the same time.
LocalThings also gives me a heads-up about five downloaded cycles that haven’t been identified and named yet. I am guessing that only matters if I want to use those downloaded cycles in Home Assistant as everything else works fine without setting them up.
So far I’ve confirmed the local authentication and state reporting, but I haven’t physically tested Start/Pause/Stop or blocked the washer’s internet access yet, so I don’t want to claim those parts are fully tested but I will play around with that some more next week.
Anyway, I thought this might be helpful since the model is older than the ones I expected to work. Thanks again for documenting all of this—it saved me a ton of trial and error!
Great to hear you sorted it out yourself. The issue with my washer entities is raised in this issue: https://github.com/mbillow/localthings/issues/269.