I run two outdoor PTZ cameras – a Reolink TrackMix P760 on the driveway and a Reolink P850 POE in the garden. Both are mounted in a corner where the wall meets the soffit, and both gave me the same headache: the standard 45-degree corner wall bracket puts the camera too close to the wall, leaving almost no clearance for the dome to look past wall lights or rain gutters. Finding a decent extension solution for this specific situation turned out to be harder than I expected.
The Problem: Not Enough Clearance
The 45-degree corner wall bracket is a popular and simple mount – you bolt it into a corner and the camera attaches to the plate at the end. In theory it works fine. In practice, when you are mounting a PTZ dome camera, the camera body needs room to swing and pan without clipping the soffit or wall. The standard bracket gives you almost none of that.
So I started searching for an extension arm that could push the camera further out from the wall. I wanted something that looked decent, was rigid, and did not require specialist tools.
What I Found: Almost Nothing Useful
After a fair amount of searching across Amazon, AliExpress, and various camera accessory stores, I could not find a commercially available extension arm that fits this specific use case well. Most camera wall arms are designed for fixed bullet cameras, not PTZ domes. The articulated metal arms that do exist are long, look industrial, and – as I found out firsthand – are surprisingly wobbly. Wind causes them to flex and vibrate, which means your camera image shakes and your PTZ presets drift over time.
The only option that looked purpose-built and halfway decent was a 3D printed extension adapter I came across. But that brings its own issues: print quality, material durability outdoors, UV degradation, and the fact that not everyone has access to a printer or wants to rely on one for a security camera mount.
The Before: A Wobbly Metal Arm
My original setup used the 45-degree corner bracket on the wall with a generic metal camera arm screwed to it. In hindsight, the arm was never going to be stable long-term. It had multiple pivot points, and even a moderate breeze was enough to make the camera bounce. The image below shows what this looked like from below – note the multi-joint articulated arm between the wall bracket and the camera mount.

The Solution: Wood
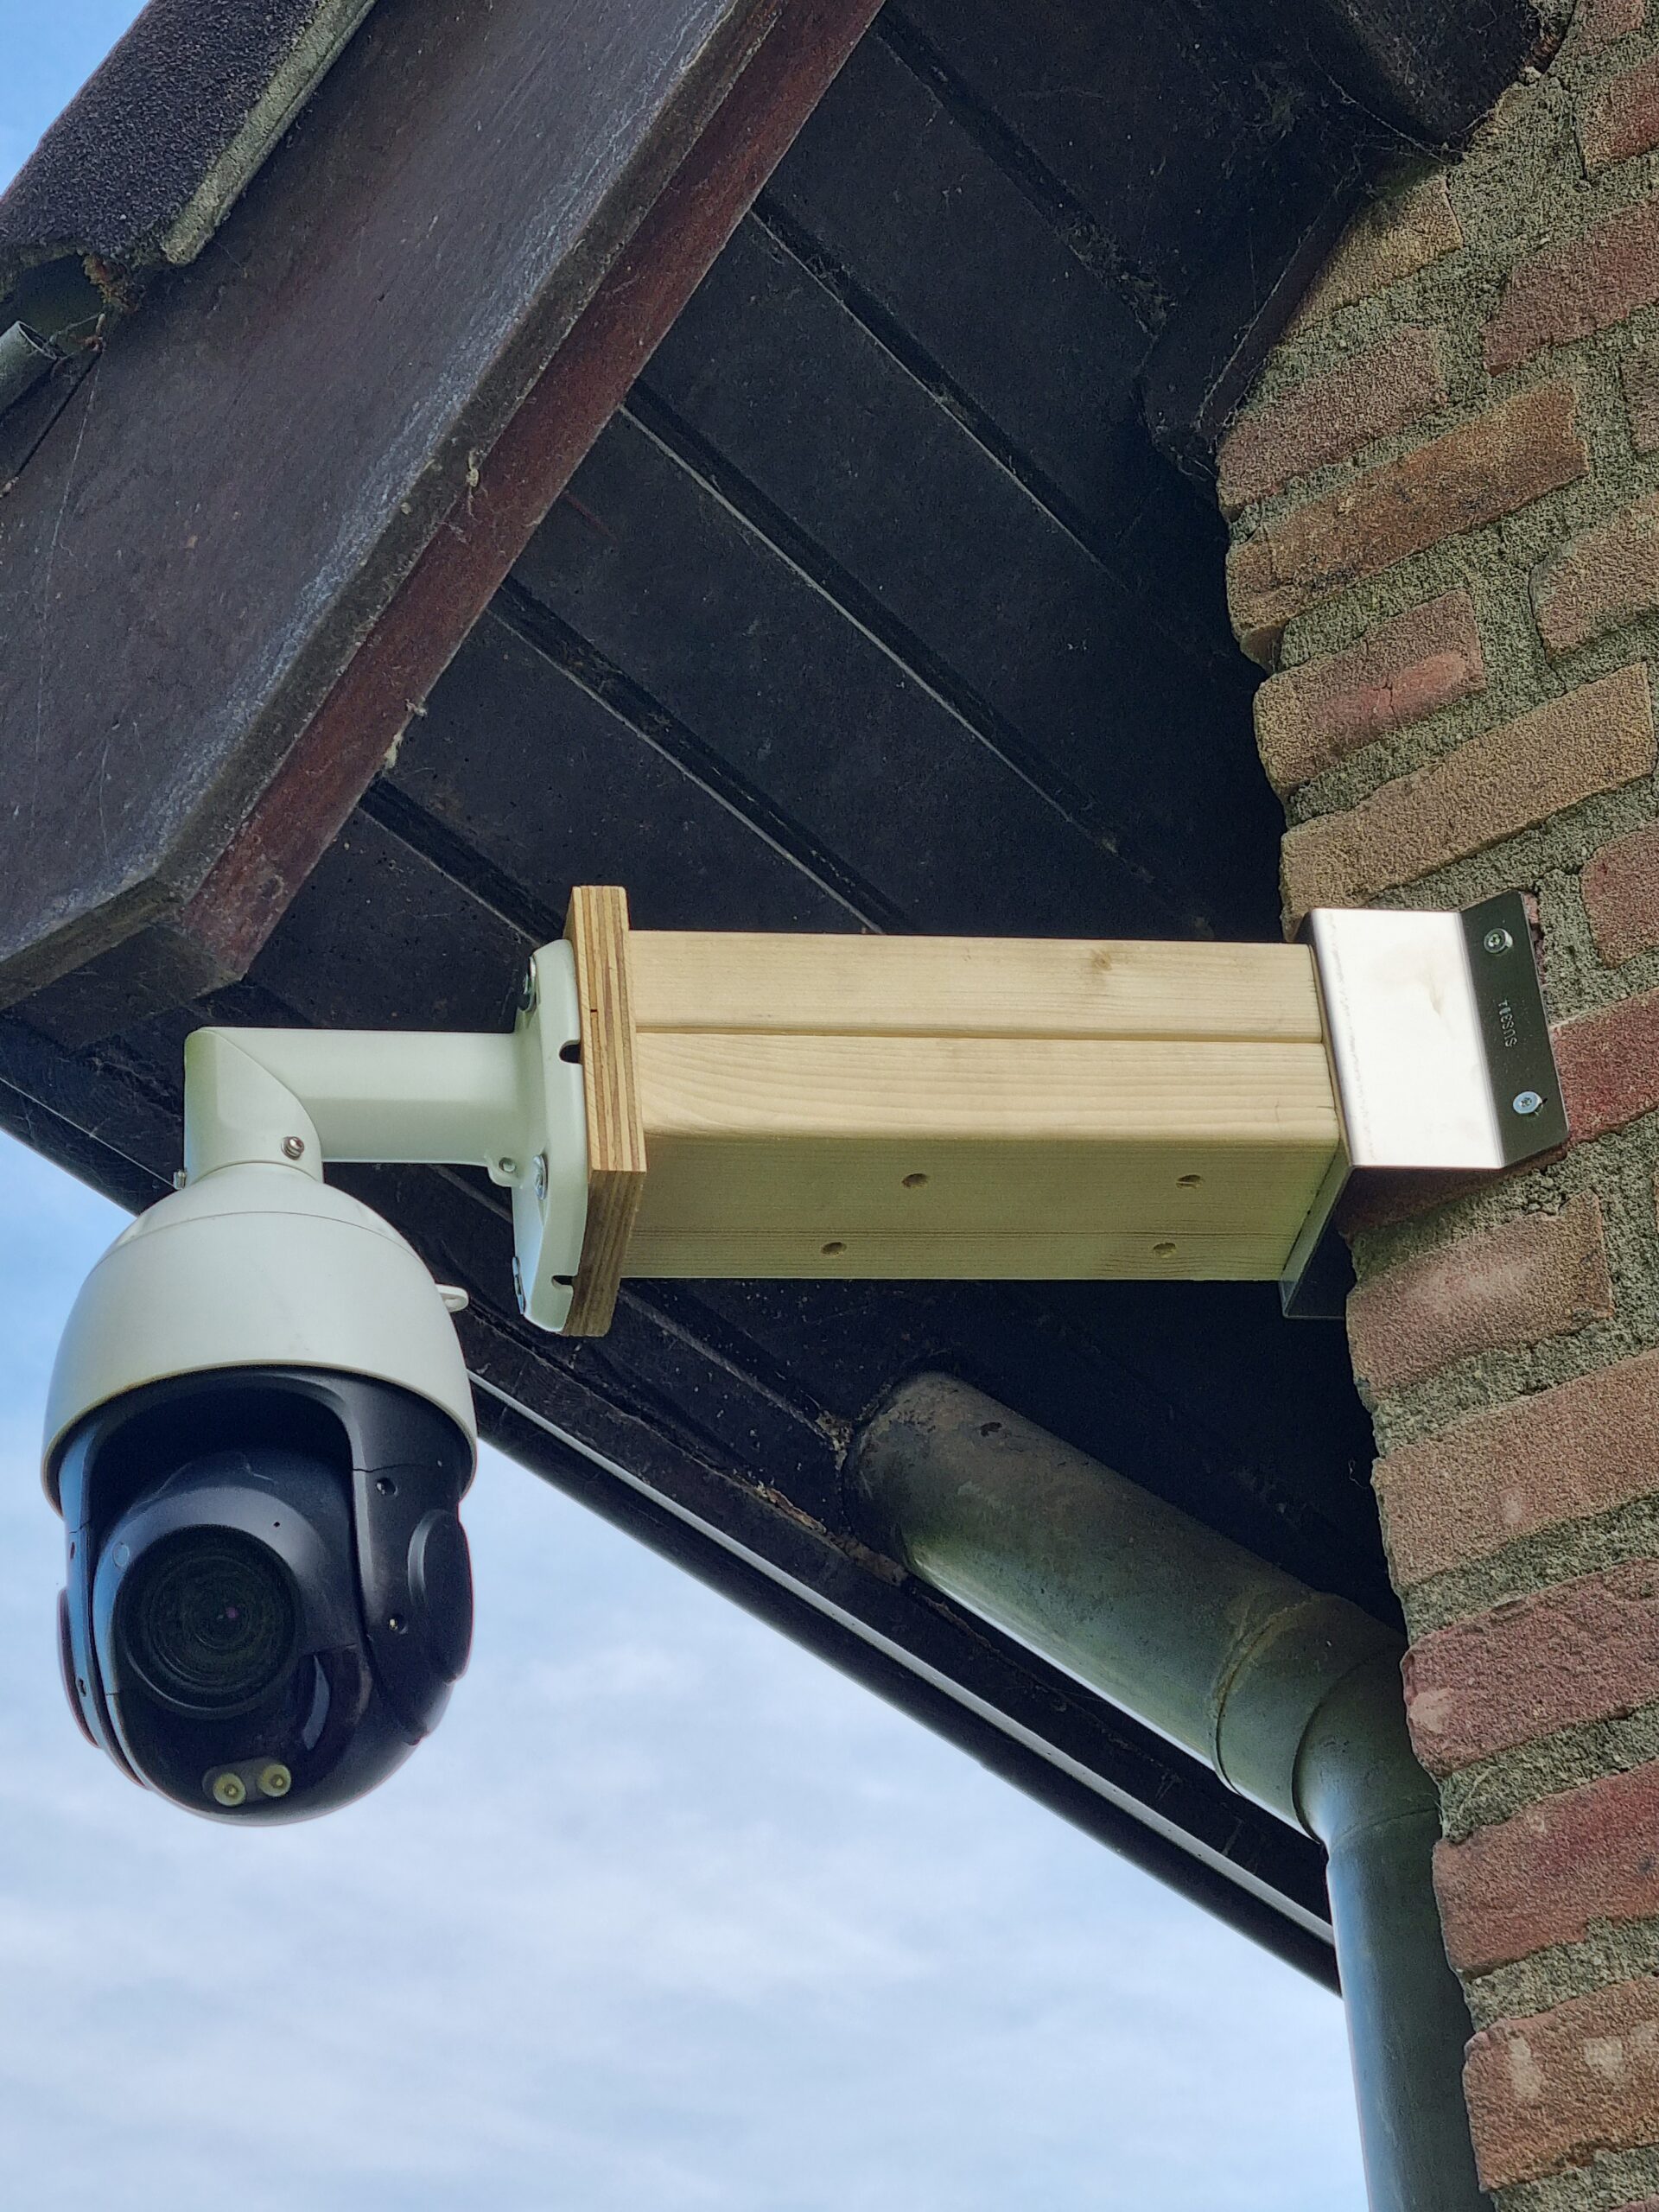
The fix turned out to be much simpler – and cheaper – than anything I found online. I kept the existing 45-degree metal corner bracket on the wall, and built a wooden extension arm from standard timber. A piece of construction wood cut to the right length, sandwiched with a second board on top for rigidity, screwed firmly to the metal bracket on the wall side, and to a wooden mounting plate on the camera side where the camera bracket attaches.
No flex. No bounce. Solid as a post. Total material cost was a few euros worth of timber from the hardware store.
The after photo below shows the result – clean, sturdy, and honestly not bad looking against the brick and soffit.
Why Wood Works Better
A wooden beam has essentially zero flex at this scale and length. Unlike a multi-joint metal arm, there are no pivot points to work loose over time. The wood transfers all vibration directly into the wall bracket, which is bolted solidly into brick. Wind, rain, or a passing truck – the camera does not move.
It is also easy to weatherproof if needed: a coat of outdoor paint or wood stain keeps it looking neat and protects against moisture. At this location under the soffit, it is largely sheltered anyway.
What You Need
- Your existing 45-degree corner wall bracket
- A length of construction timber (e.g. 44x94mm or similar – size it to the clearance you need)
- A second piece of wood or plywood for the camera mounting plate
- Wood screws
- Plugs and screws to connect wood to the metal bracket and camera bracket
- Outdoor wood treatment or paint (optional but recommended)
The Result
Both the driveway P760 and the garden P850 are now on wooden extension arms. No more vibration in the image. PTZ presets hold their position. And it cost almost nothing compared to buying a commercial arm that probably would not have been rigid enough anyway.
Sometimes the best solution is the most obvious one – and it does not need a 3D printer.