One month ago, the Amazon echo dot wasn’t yet available in NL, only in UK. so I ordered via my family in the US, 2 Amazon Echo Dots. The Dot has exact the same features as the normal Echo, except a high quality speaker. The Dot contains a internal speaker, but the quality is not that haigh, it’s nice for voice, but not for listening to music. You are able to connect via 3,5mm jack an external speakerset or AVR system. Because I don’t use the audio output, the Dot is with the cost of $ 49,99,- a perfect voice recognition aka speech integration add-on for my home automation setup.
What you need for setup for this “US-version” setup:
- Amazon Account
- At least one Amazon Echo (Dot)
- Amazon Alexa app US version
- Homeseer 3 (requires version 3.0.0.293 or later)
- MyHomeseer account
1.Switch your Amazon account to US (if applicable)
The configuration was a challenge, because I live in Europe, at the time of doing the setup, no Amazon Echo was avalable here. All settings has to be done in US, as also my Amazon account has to be changed from UK to US (click here for support on switching your account).
2.Install Amazon Alexa app (US version)
Even you have to install the Alexa app (US version). The best option is to install a (free) VPN app , like “Rocket VPN” where you can choose for a VPN provider in probably any country in the world. After installing this app, you are able to connect to a US VPN host and install the Alexa app.
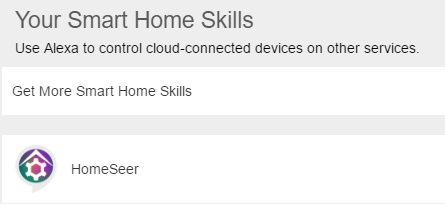
3.Add “Homeseer” skill to app
In the Smart Home section of the app, you can add “skills”. A skill is like a connection to a certain system. If you search for “Homeseer” you will have 1 result and when you press this skill, you are able to “enable” it in the top right corner. Note: This skill is only working for US configuration.
Enter you MyHomeseer account credentials and click the Login button. Your Amazon Echo should now be linked to your HomeSeer system. More info about Amazon echo integration with Homeseer, click here.
4.Discover devices
In the “Smart Home” section of the Alexa app, you are able to “Discover devices”. You will notice not all your Homeseer devices will be discovered directly. In some cases you need additional configuration for the devices that are not discovered or when Alexa is not able to control them. In the Homeseer log an entry will be visible “Amazon Echo Discovery requested, version: 2”.
5.Configure devices in Homeseer
In case Alexa can’t discover you device, or the device can’t be controlled, additional configuration has to be made. Also make sure your devices, are voice enabled. Check this in the Configuration tab of the device(s).
Example On/Off device:
A simple On/Off device could work, but sometimes extra settings has to be made.
![]()
Open the Homeseer device and go to tab “Status Graphics”:

The “Control use” setting is normally set to “Not Specified” In this case Alexa can’t control the device.
Change both entries to their status (Off and On).
At the right side, the “Status Control” should be on “both” or “control”.
At the bottom of the Homeseer device page, click “Done” and the device settings are saved.
Alexa is now able to control this device, via the device name and the status.
Alexa command for this device
- On: Alexa…..turn on <name of device> ==> Alexa…..turn on Hall light
- Off: Alexa…..turn off <name of device> ==> Alexa…..turn off Hall light
If necessary, please press “Discover devices” again in the Alexa app.
Example Dim device:
In case of a device that have Dim levels, like a light/lamp, you need to set the “Control Use” settings as well:

Open the Homeseer device and go to tab “Status Graphics”:
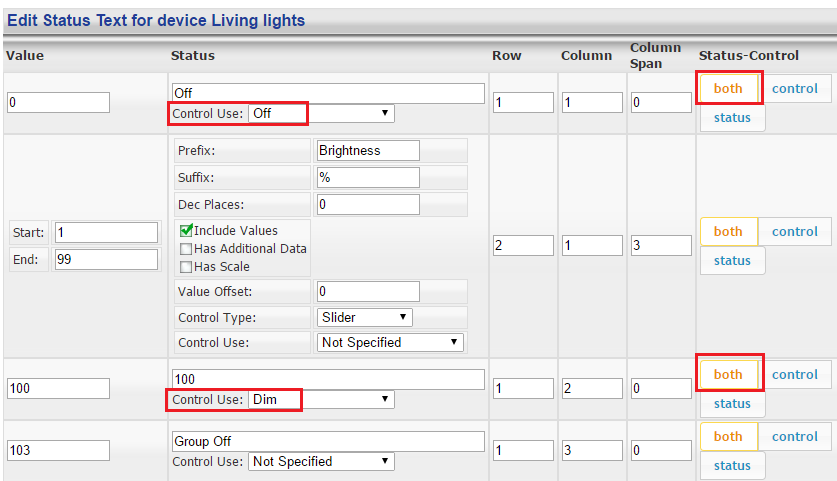
The “Control Use” setting is normally set to “Not Specified” In this case Alexa can’t control the device.
In the case of “Status = Off”, define the “Control Use” also to “Off”.
Not every Dim level has to be specified. In this case “100” was already specified, and therefor the “Controle Use” has to be set to “Dim”
At the right side, the “Status Control” should be on “both” or “control”.
At the bottom of the Homeseer device page, click “Done” and the device settings are saved.
Alexa is now able to control this device, via the device name and the status.
Alexa command for this device
- On: Alexa…..turn on <name of device> ==> Alexa…..turn on Hall light
- Off: Alexa…..turn off <name of device> ==> Alexa…..turn off Hall light
- Dim: Alexa…..set <name of device> to <dim level> ==> Alexa…..set Living lights to 50.
If necessary, please press “Discover devices” again in the Alexa app.
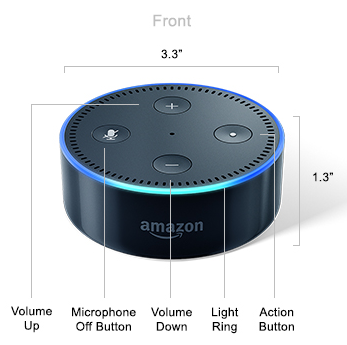
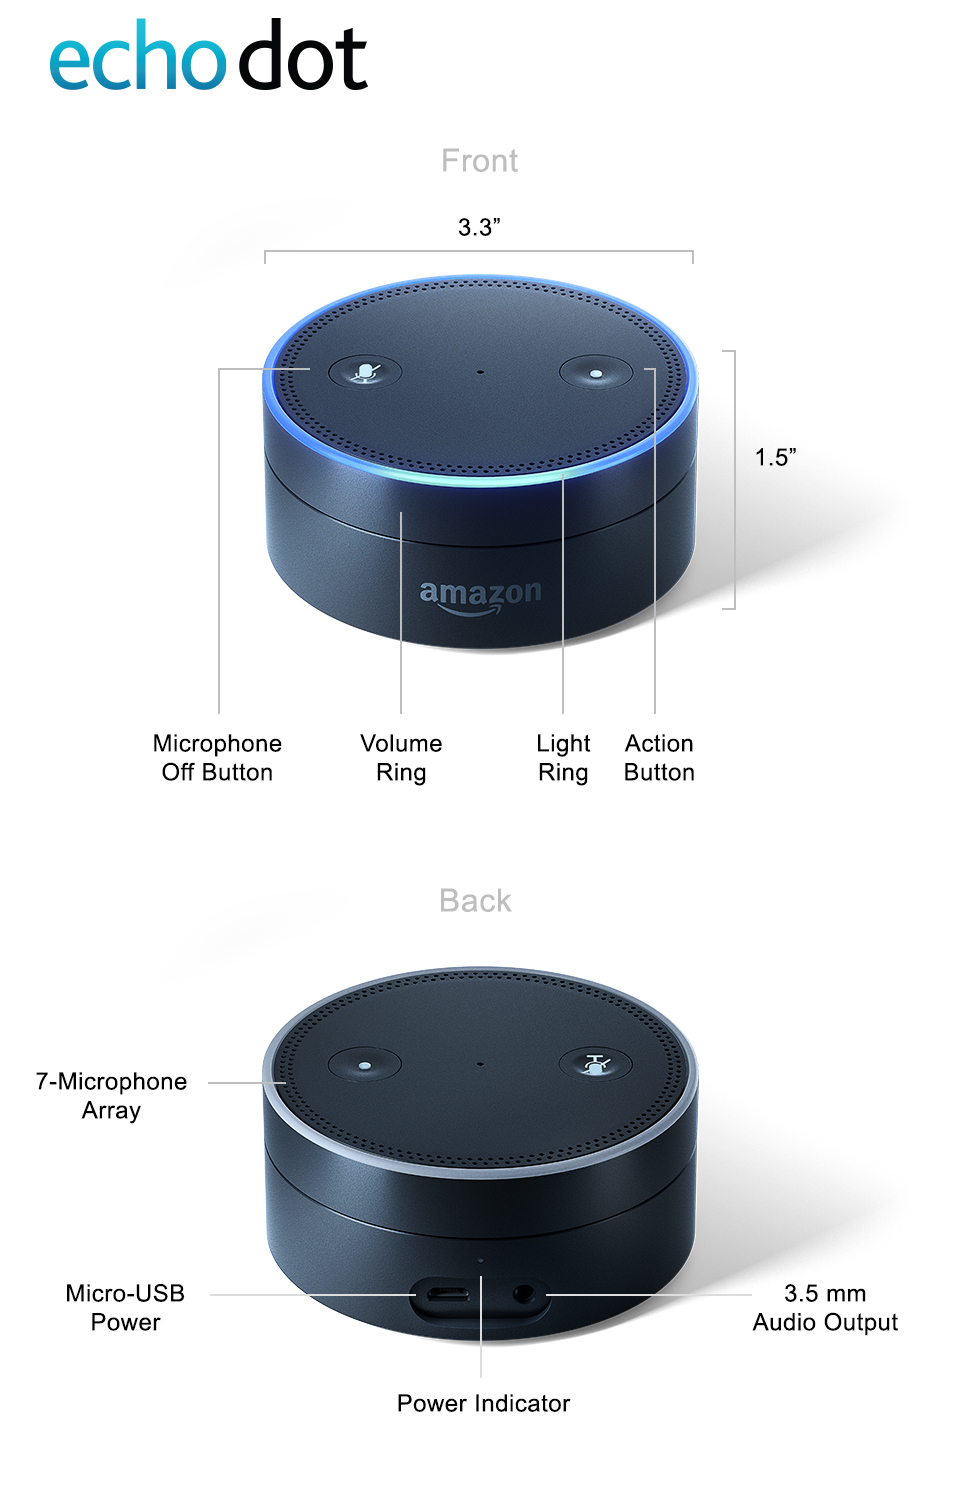
Specifications of the Dot:
| Size | 1.3″ x 3.3″ x 3.3″ (32 mm x 84 mm x 84 mm) |
| Weight | 5.7 oz. (163 grams) Actual size and weight may vary by manufacturing process |
| Wi-Fi Connectivity | Dual-band Wi-Fi supports 802.11 a/b/g/n (2.4 and 5 GHz) networks. Does not support connecting to ad-hoc (or peer-to-peer) Wi-Fi networks. |
| Bluetooth Connectivity | Advanced Audio Distribution Profile (A2DP) support for audio streaming from your mobile device to Echo Dot or from Echo Dot to your Bluetooth speaker. Audio/Video Remote Control Profile (AVRCP) for voice control of connected mobile devices. Hands-free voice control is not supported for Mac OS X devices. Bluetooth speakers requiring PIN codes are not supported. |
| Audio | Built-in speaker for voice feedback when not connected to external speakers. 3.5 mm stereo audio output for use with external speakers (audio cable not included). |
| System Requirements | Echo Dot comes ready to connect to your Wi-Fi. The Alexa App is compatible with Fire OS, Android, and iOS devices and also accessible via your web browser. Certain skills and services may require subscription or other fees. |
| Included in the Box | Echo Dot, power adapter (9W), Micro-USB cable, and Quick Start Guide |
| Colours | White/Black |
 |
 |
More info about the Dot can be find it on Amazons website.