As discussed in the previous post on the Sonoff, this time an input signal will be added.
Switching a light bulb is now easy, but what to to with the input GPIO?
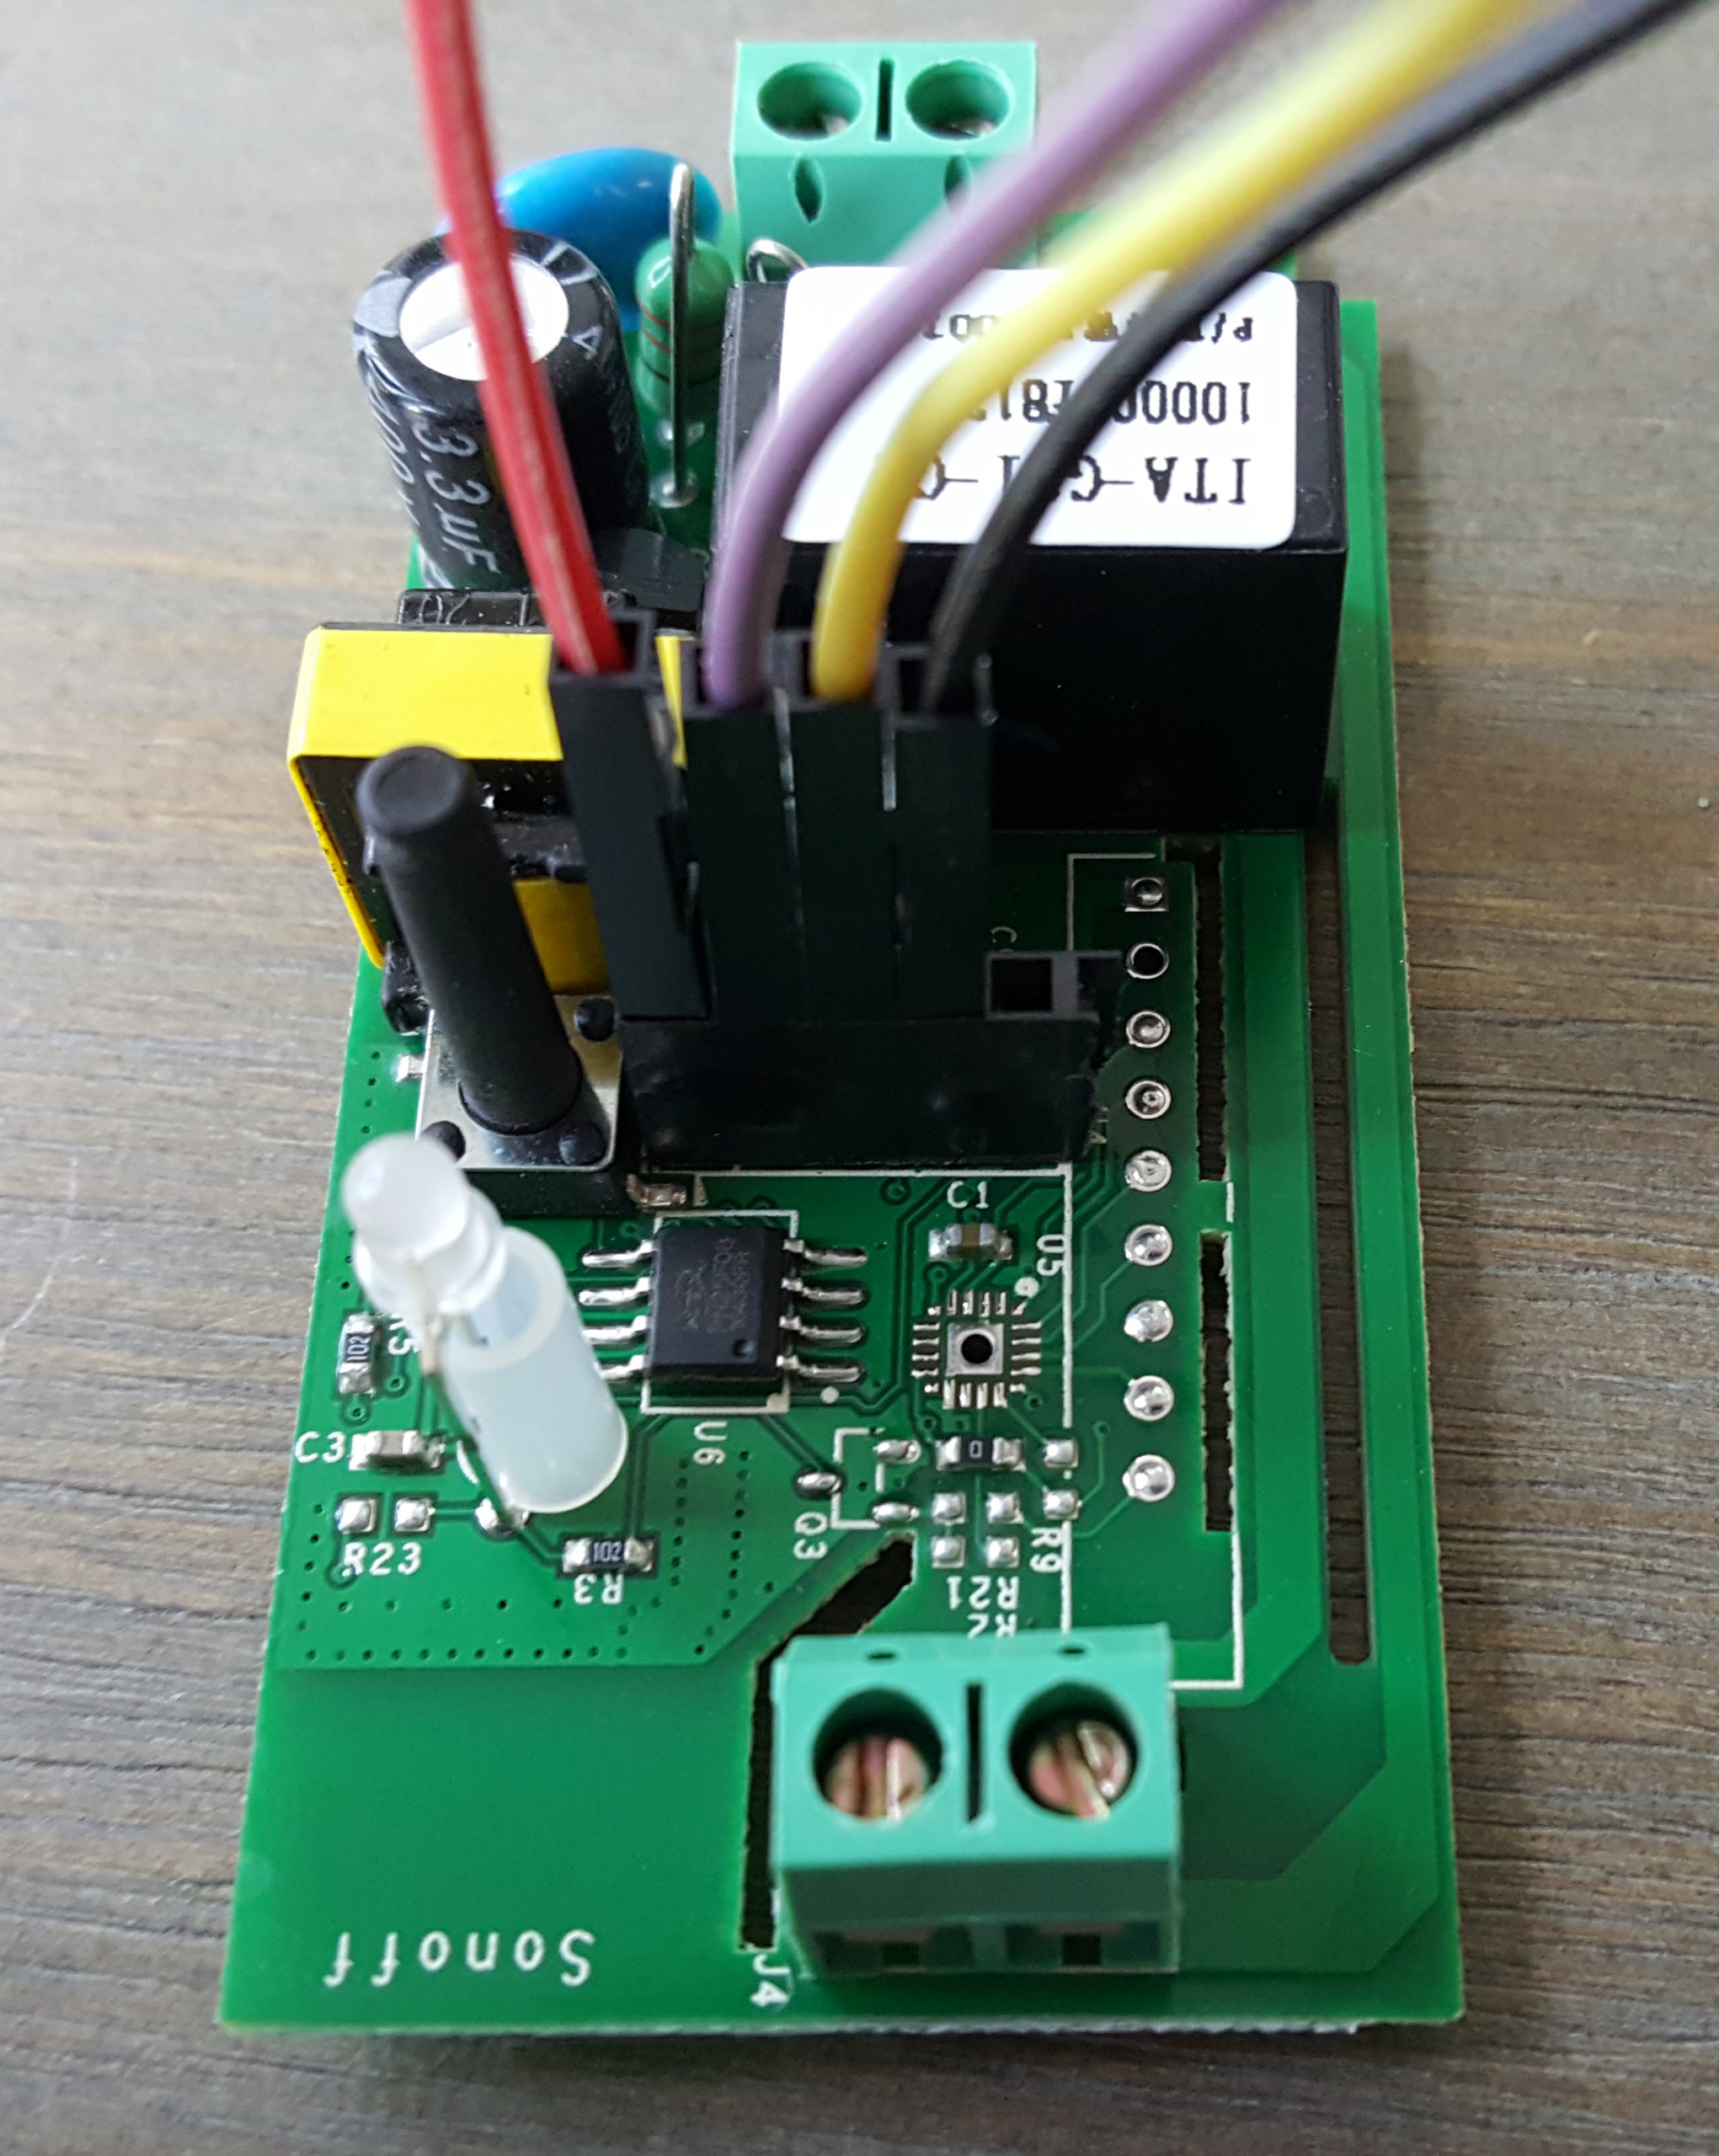
On the earlier soldered header there is one pin left, that can be used for input. GPIO-14 is the pin that can be used for this. In my case this Sonoff will switch a light bulb, but for the input I want to have a doorsensor, via a reed-contact/magnet.
GPIO-14
According the above picture, the unused pin on the right (next to the black wire) could be used for input, together with the ground pin.
In production environment the red, purple, yellow and black wires are not used, so both pins GND + GPIO14 can be used for input signals.
Configure switch
The configuration of the ESP easy firmware can be done as follow:
In the ESP easy setup, go to tab Devices and config an “Switch Input”:
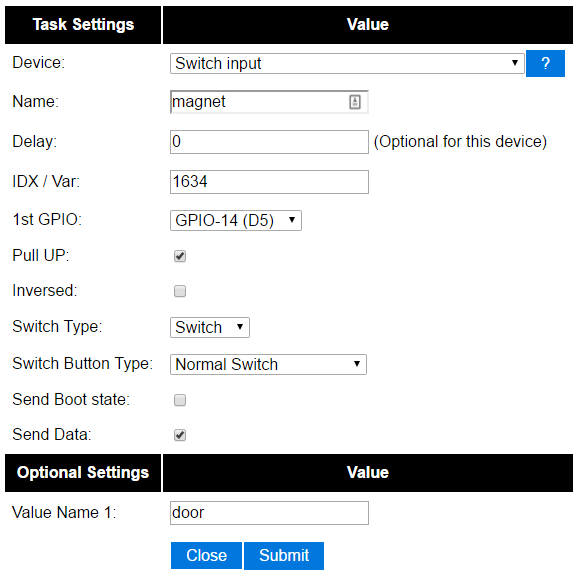 |
Device : Switch Input
Name: example “magnet” because I’ll use a magnet as a doorsensor IDX / Var: In my case, this is the Ref.ID of the Homeseer device. 1st GPIO: GPIO-14 Pull Up: selected (default setting) Switch Type: Switch (default setting) Switch Button Type: Normal Switch Value Name 1: example “door” |
Click Submit and thereafter on Close.
Now the input on GPIO-14 is configured as a device:
![]()
When the magnet sensor is switched from state, you will see on the Device page the green value is changing also from 0 to 1 and back to 0 (after page refresh).
Via tab Rules, you can add a script that when the GPIO-14 pin change state, the relais will be triggered. In my case I don’t want a direct contol, so I need the status of the magnet sent to Homeseer. From here I can do what I want, like switching the relais on the Sonoff.
Create a Homeseer state device
To receive the status of the GPIO-14 in Homeseer, a new device has to be created.
![]()
 Send GPIO state to HomeseerBe aware the Sonoff will send the values 0 or 1. Compared to the default setting in Homeseer, the values are 0 and 100. After creating a new device, the Status Graphics and values has to be changed for 100 into 1. Status can be renamed from Off to Closed and On to Open, but is not mandatory.
When GPIO-14 is switching state, Homeseer has to be notified automatically. For this you can add a “Publish template” with a predefined command. Based on the new state, the variablees in the command will be updated and send as a HTTP command.
Homeseer as a built -in JSON API, so therefor we need to configure a “Generic HTTP” protocol.
In tab “Config” add the following details:
 |
Protocol “Generic HTTP”.
Controller IP: ip-address-of-Homeseer Controller Port: default=80, could be different depending on your setup |
Press Submit at the bottom of the page.
Publish template
Go to Tab “Tools” and click on “Advanced”
In the second line, the “Publisch template” has to be entered.
The JSON command for Homeseer could be like (without quotes): “JSON?request=controldevicebyvalue&ref=%id%&value=%value%”

%value% = the value of the device (0/1) that will be entered when the device(=GPIO-14) switch from state.%id% = ref-id of the Homeseer device, which is also configured in tab “Devices” for the specific device (IDX / Var)
Finally, when the device switch from state, the full command will be sent to Homeseer (example): “http://192.168.178.32/JSON?request=controldevicebyvalue&ref=1634&value=1″ (or 0)

I’ve created a simple input for myself. I’ve detailed it here if interested – isonoff.wordpress.com
Thanks for this information.
I have an application to replace and enhance a water meter/chlorine pump controller. Currently the dry contact on the water meter starts a chlorine pump and it runs for X number of seconds. The controller has failed too many times and does not give me any information on water or chlorine usage
I want to add some additional intelligence to this operation by keeping track of gallons of water, and chlorine pump run time using Node Red on a RPi.