My garden irrigation project needs real soil data: moisture, temperature and salinity at several spots, without running cables through the garden. The Ecowitt WH52 soil sensor does exactly that over 868 MHz radio, but it normally reports to a vendor gateway and a cloud service. I wanted the values in Home Assistant, locally, with no gateway in between.
This post is the complete route I took. I started with OpenMQTTGateway on a LILYGO T3 868 MHz board (specifically v1.6.1) and got the WH52 data flowing over MQTT. Then I rebuilt the receiver as a native ESPHome device with a small custom component of my own. It decodes only my two sensors, exposes ten clean entities to Home Assistant and shows live status on the board’s OLED. Everything below comes from that build, including the log output and the salt water test I used to verify the conductivity readings.
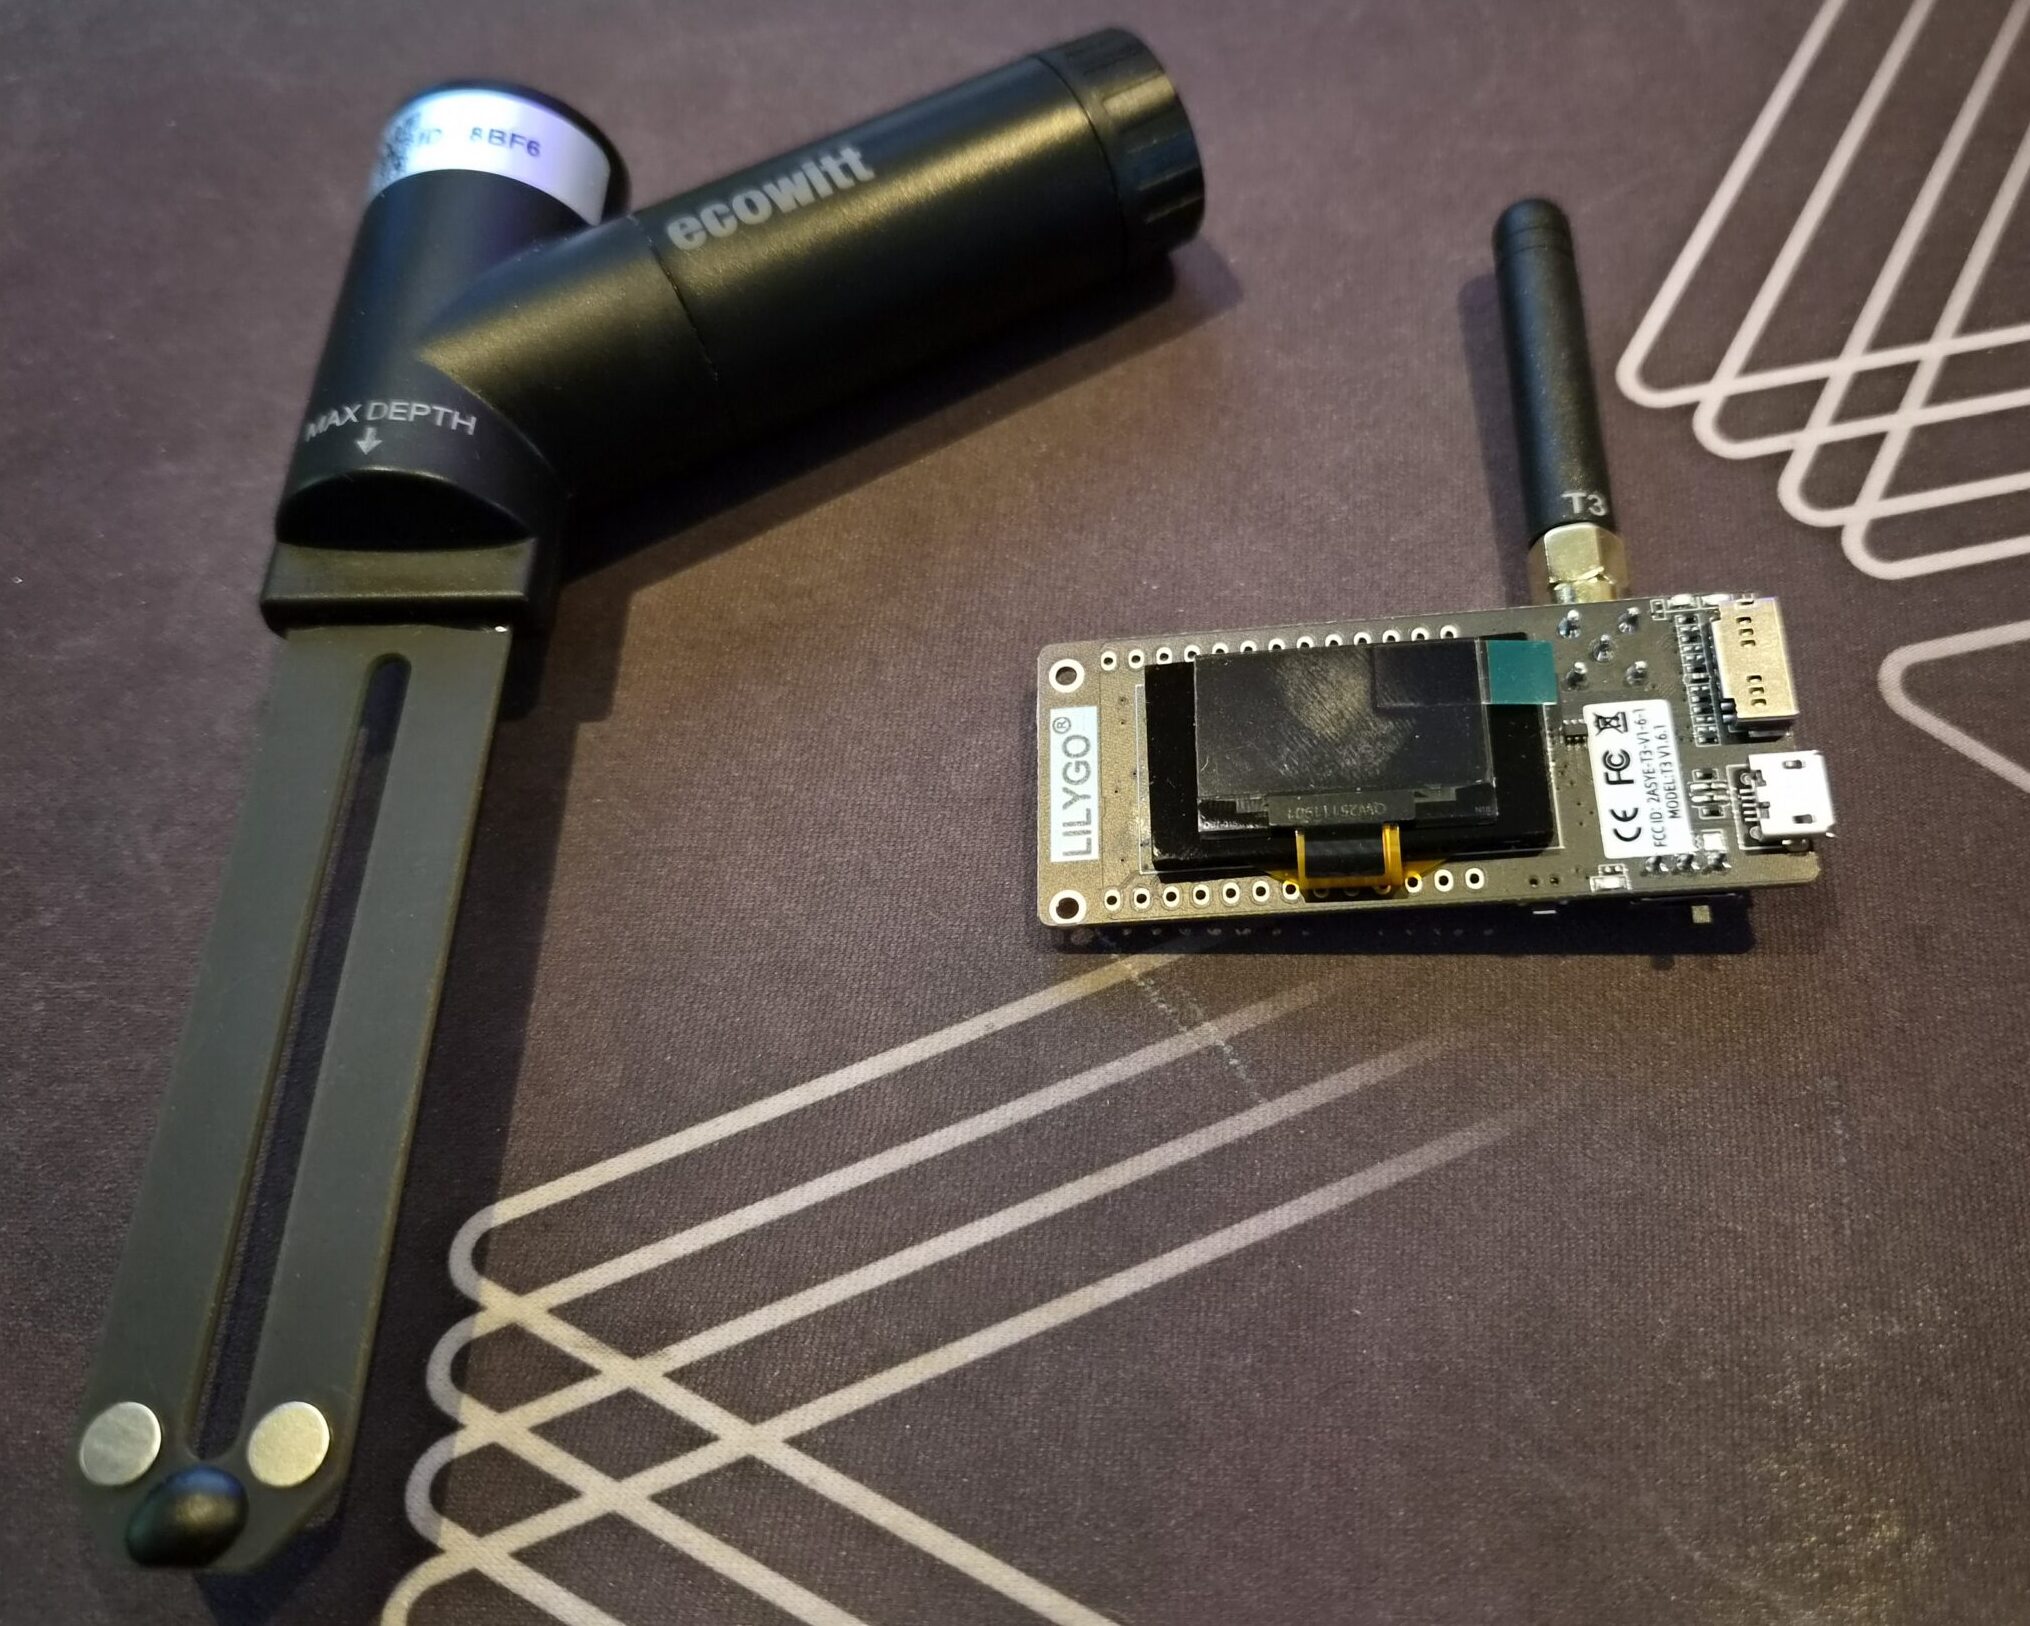
The sensor: Ecowitt WH52
The WH52 is a battery-powered soil probe. It measures soil moisture, soil temperature and electrical conductivity (EC), and it also reports its battery voltage. It transmits at 868.350 MHz using FSK modulation. The open source decoder rtl_433 already knows it as Fineoffset-WH52, so I did not have to reverse engineer anything on the radio side.
I have two sensors, with the IDs 008bf6 and 008d14. I use those IDs later to filter out everything else on the band.
A decoded message looks like this (trimmed):
{"model":"Fineoffset-WH52","id":"008d14","temperature_C":24.0,"moisture":0,"conductivity":4.64844,"battery_V":2.84,"boost":0,"mic":"CRC","rssi":-90}
| Field | Example | Meaning |
|---|---|---|
| model | Fineoffset-WH52 | The protocol rtl_433 matched |
| id | 008d14 | Unique sensor ID, used for filtering |
| temperature_C | 24.0 | Soil temperature in °C |
| moisture | 73 | Soil moisture in percent |
| conductivity | 2114.10156 | Electrical conductivity in µS/cm (verified further down) |
| battery_V | 2.84 | Battery voltage |
| boost | 7 | A counter I saw count down after the moisture changed |
| mic | CRC | How the message was verified |
| rssi | -28 | Signal strength in dBm |
The hardware
The receiver is a LILYGO TTGO LoRa32 T3 868 MHz board (v1.6.1) with an ESP32 (rev 1.1, dual core), an SX1276 radio and an SSD1306 128×64 OLED on I2C (address 0x3C, SDA on GPIO21, SCL on GPIO22). Attach the 868 MHz antenna before powering the radio.
Before I settled on this board, I compared several candidates. For this job, the radio has to run in FSK mode and hand the raw signal to a GPIO pin, because the rtl_433_ESP decoder works on that raw signal rather than on LoRa packets. On this board, the decoder gets its data through GPIO32.
Part 1: OpenMQTTGateway
OpenMQTTGateway (OMG) is an ESP32 firmware that bridges radio protocols to MQTT. Its RTL_433 module uses the rtl_433_ESP library, which brings the rtl_433 decoders to an ESP32 with an SX127x radio. The rtl_433_ESP library provides the actual decoding logic for many wireless sensors, including the Ecowitt/Fine Offset WH52. Although its name says “433”, the library is not limited to 433 MHz; it can decode supported protocols on other frequencies when paired with a suitable radio.
In this setup, the LILYGO’s SX1276 radio is tuned to 868.350 MHz, where the WH52 transmits. The SX1276 receives and demodulates that 868 MHz radio signal, while rtl_433_ESP recognizes the WH52 protocol and converts the received data into useful values such as moisture, temperature, conductivity, battery voltage, and RSSI. In short: 868.350 MHz is the radio frequency; rtl_433_ESP is the protocol decoder.
Installing and configuring
Prerequisite: have an MQTT broker up and running already in your network.
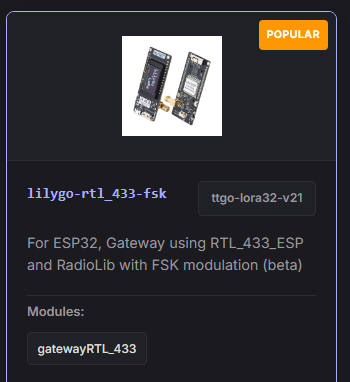
It starts with the the OpenMQTTGateway website https://docs.openmqttgateway.com/dev/prerequisites/board.html. Since this post is all about the LilyGo, we need to find the “lilygo-rtl-433-fsk”. Click on that board as shown below:
It should open the following, or open the url straight here: https://docs.openmqttgateway.com/dev/upload/board-selector.html?env=lilygo-rtl_433-fsk
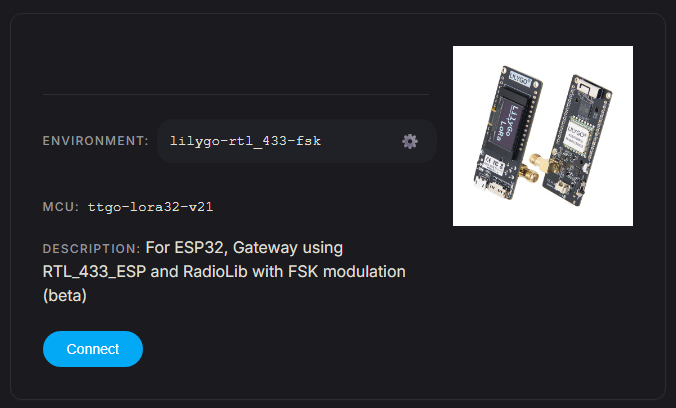
Connect the board via USB to your computer. Make sure the right USB driver is installed for this first.
Click the blue colored Connect button, select your COM-Port and follow the steps on screen. Now the OpenMQTTGateway will be flashed to the Lilygo board. Be patient, this will take a couple of minutes.
Once this is done, a WiFi network becomes available, connect your phone to it and set up Wifi and MQTT broker credentials.
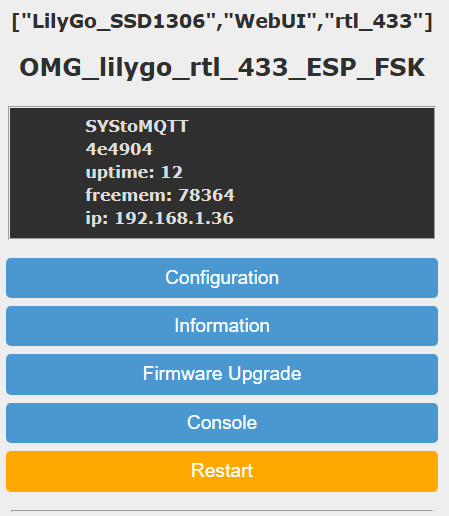
As a final configuration, we have to set it to the right frequency.
Within Configuration, go to RF. You’ll see the Frequency here and the Active Library. Only the Frequency has to be changed from 915.000 to 868.350. Save it:
Setting the frequency
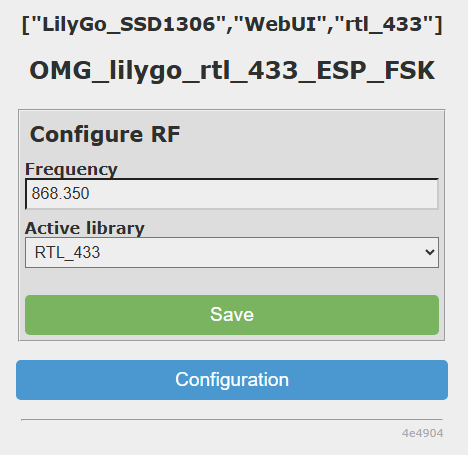
I set the RF / receiver to 868.350 MHz. The gateway reports its receiver state on MQTT:
{"frequency":868.35,"rssithreshold":-100,"ookthreshold":15,"active":3,"rssi":-109,"avgrssi":-109,"count":1,"rtl433_stack":19408}
The frequency is the one the WH52 uses. rssithreshold is the signal level below which the receiver ignores traffic. rssi and avgrssi show the current and average level, and -109 dBm is just the noise floor while nothing is transmitting.
Seeing the data arrive
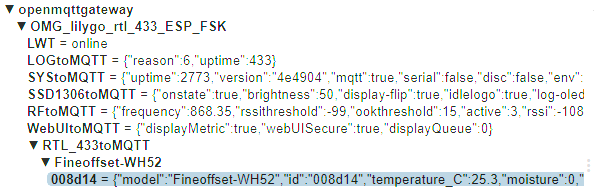
Within a minute or two, decoded WH52 messages appeared on the broker. Each of my two sensors was clearly identifiable by its ID. One is shown below.
In the highlighted text, you see clearly the identifier of the WH 52 device (008d14) and the payload behind it.
Home Assistant sensors from YAML
I kept the Home Assistant side in plain YAML MQTT sensors for now, so I could see exactly what was mapped. The pattern for one value looks like this (replace the topic with your own):
mqtt:
  sensor:
    - name: "WH52 008d14 Moisture"
      state_topic: "REPLACE_WITH_YOUR_MQTT_TOPIC"
      value_template: "{{ value_json.moisture }}"
      unit_of_measurement: "%"
      state_class: measurement
This worked.
Part 2: Moving to native ESPHome
Everything in Part 1 worked flawlessly, but I wanted the receiver to behave like any other device in Home Assistant: entities with correct units and device classes, only my two sensors (for now), an encrypted connection to Home Assistant, OTA updates and a status display on the board itself. ESPHome provides all of that, but it has no component for this radio and decoder combination. So I wrote a small external component.
I could have stopped here. There are benefits of OpenMQTTGateway, like it receive all kind of sensors in range and make MQTT data from it automatically, but I don’t need to monitor my neighbors devices. For now, I’d like to receive data from my own WH52 soil moisture sensors only. I read online that moving to ESPHome could be problematic, but I like a challenge, so let me show you how I step away from OpenMQTTGateway and move to ESPHome with the same Lilygo device.
Before we’re going to talk about the details about this customer component, let me try to explain why I build it like this for ESPHome.
The YAML we use normally in ESPHome contain specific configurations that ESPHome is comfortable like reading values from connected or built in sensors, but we can’t say natively something like “Use the SX1276 with rtl_433_ESP, listen for Fineoffset/Ecowitt WH52 packets, decode them, accept only IDs 008bf6 and 008d14, and expose their values as ESPHome sensors“.
The architecture
WH52 sensor
   |  868.350 MHz FSK
   v
SX1276 radio
   v
rtl_433_ESP library
   |  decoded JSON
   v
rtl433_sx1276.h  (filters WH52 + sensor ID, extracts values)
   v
__init__.py  (ESPHome sensor definitions)
   v
ESPHome  ->  encrypted native API  ->  Home Assistant
The custom component we’re talking about here lives in the ESPHome config folder:
“config” means your main Home Assistant folder, where ie. your configuration.yaml file is stored as well.
This how the file structure will look like:
/config/esphome/
└── custom_components/
    └── rtl433_sx1276/
        ├── __init__.py
        └── rtl433_sx1276.h
What __init__.py does
Think of __init__.py as the bridge between YAML and C++. When ESPHome sees this in your YAML:
rtl433_sx1276:
  id: rtl433_receiver

  008bf6_moisture:
    name: "WH52 008bf6 Moisture"

  008bf6_temperature:
name: "WH52 008bf6 Temperature"rtl433_sx1276: means.The __init__.py file teaches ESPHome about it. It defines which YAML options are valid and required, creates the Home Assistant sensor objects, and connects those sensors to functions in our C++ component.
For example:
CONF_008BF6_MOISTURE = "008bf6_moisture"Then:
cv.Required(
CONF_008BF6_MOISTURE): sensor.sensor_schema(...)
tells ESPHome this option must exist and represents an ESPHome sensor.
And finally:
s = await sensor.new_sensor(config[CONF_008BF6_MOISTURE])
cg.add(var.set_008bf6_moisture_sensor(s))That’s also why the earlier _raw problem appeared as a YAML validation error: the old __init__.py schema was requiring those additional sensors.
What rtl433_sx1276.h does
The .h file contains the actual receiver logic running on the ESP32. This is where we do things that ordinary YAML couldn’t do. For example, it starts rtl_433_ESP:
bool ok = rtl433_radio.begin(32, 868.35);

if (ok) {
  rtl433_radio.enableReceiver();
}rtl_433_ESP decodes something, our callback receives the JSON:static void rtl433_callback(char *message)deserializeJson(doc, message);if (strcmp(model, "Fineoffset-WH52") != 0) {
return;
}if (strcmp(sensor_id, "008bf6") == 0) {
...
} else if (strcmp(sensor_id, "008d14") == 0) {
...
}.h file then publishes:
moisture
temperature_C
conductivity
battery_V
rssi__init__.py. It also contains the additional logic we built for the OLED, such as remembering when each WH52 was last received and determining whether it has become STALE.So the whole chain is
Conceptually, the implementation now looks like this:
WH52 sensor
│
│ 868.350 MHz FSK
▼
SX1276 radio
│
▼
rtl_433_ESP library
│
│ decoded JSON
▼
rtl433_sx1276.h
│
│ filters WH52 + sensor ID
│ extracts values
▼
__init__.py
│
│ ESPHome sensor definitions
▼
ESPHome
│
│ encrypted native API
▼
Home AssistantThe main YAML sits around all of this and says how the finished component should be configured.
So there was a good reason we didn’t try to cram everything into YAML. The YAML configures the device, __init__.py integrates our custom functionality into ESPHome’s configuration/code-generation system, and rtl433_sx1276.h performs the actual radio/decoding/runtime work on the ESP32.
p dir=”auto” data-start=”3916″ data-end=”4056″ data-is-last-node=”” data-is-only-node=””>In effect, we created a small custom ESPHome component specifically for receiving your Ecowitt WH52 sensors through the LILYGO’s SX1276.
__init__.py: the bridge between YAML and C++
ESPHome does not know what rtl433_sx1276: means, and this file teaches it. It defines which YAML options are valid, creates the sensor objects and connects them to the C++ code:
CONF_008BF6_MOISTURE = "008bf6_moisture"
cv.Required(CONF_008BF6_MOISTURE): sensor.sensor_schema(...)
s = await sensor.new_sensor(config[CONF_008BF6_MOISTURE])
cg.add(var.set_008bf6_moisture_sensor(s))
rtl433_sx1276.h: the runtime logic
The header starts the radio on 868.35 MHz with the data signal on GPIO32:
bool ok = rtl433_radio.begin(32, 868.35);
if (ok) {
rtl433_radio.enableReceiver();
}
When a packet is decoded, a callback receives the JSON:
static void rtl433_callback(char *message)
The callback parses the JSON and rejects anything that is not a WH52:
deserializeJson(doc, message);
if (strcmp(model, "Fineoffset-WH52") != 0) {
  return;
}
Then it accepts only my two sensor IDs. That filter matters, because the 868 MHz band is busy:
if (strcmp(sensor_id, "008bf6") == 0) {
    ...
} else if (strcmp(sensor_id, "008d14") == 0) {
    ...
}
Each accepted packet publishes moisture, temperature, conductivity, battery voltage and RSSI to the sensors created in __init__.py. The same file remembers when each sensor was last heard, so the OLED can show a STALE status when one goes quiet.
At the bottom this blog post, the full project files is available for download. The ZIP folder contains:
- ESPHome board yaml (change API key and eventually the Wifi static IP address and sensors IDs)
- __init__.py
- rtl433_sx1276.
The YAML side
The component is configured with one block, using ID-based option names:
rtl433_sx1276:
  id: rtl433_receiver

  008bf6_moisture:
    name: "WH52 008bf6 Moisture"

  008bf6_temperature:
    name: "WH52 008bf6 Temperature"
The rest of the device is standard ESPHome. This is what the boot log reports for it:
ESPHome version 2026.9.0
ESP32 Chip: ESP32 rev1.1, 2 core(s)
I2C Bus: SDA GPIO21, SCL GPIO22, Frequency 50000 Hz
Found device at address 0x3C
I2C SSD1306: Model SSD1306 128x64, Address 0x3C, Update Interval 1.000s
WiFi: Connected YES, Signal strength -63 dB
API Server: Noise encryption: YES
Safe Mode: Successful after 60s, Invoke after 10 attempts
Verifying the readings
First packets
Both sensors started reporting on their own. This is how a packet shows up in the ESPHome log:
Decoded: {"model":"Fineoffset-WH52","id":"008bf6","temperature_C":24.2,"moisture":0,"conductivity":4.72656,"battery_V":2.84,"boost":0,"mic":"CRC","rssi":-28}
WH52 received: ID=008bf6
'WH52 008bf6 Moisture' >> 0 %
'WH52 008bf6 Temperature' >> 24.2 °C
'WH52 008bf6 Conductivity' >> 4.72656
'WH52 008bf6 Battery Voltage' >> 2.84 V
'WH52 008bf6 RSSI' >> -28 dBm
Weak signals decode too: one packet from the second sensor arrived at -90 dBm and was still decoded correctly.
The salt water test
I did not want to guess at a conductivity conversion factor. So I put the second sensor in salt water and compared the readings:
| In air | In salt water | |
|---|---|---|
| Moisture | 0 % | 73 % |
| Conductivity | 4.65 | 2114.10 |
| Temperature | 24.0 °C | 24.0, 23.7, 23.4 °C |
The decoder output is therefore already in µS/cm, and no scaling is needed. The temperature drifted down over the following packets as the probe cooled in the water.
Update rate
The two sensors reported roughly every 70 seconds while idle. After the moisture changed, packets arrived about every 10 seconds, and the boost field counted down over the packets (7, 6, 5).
The final result
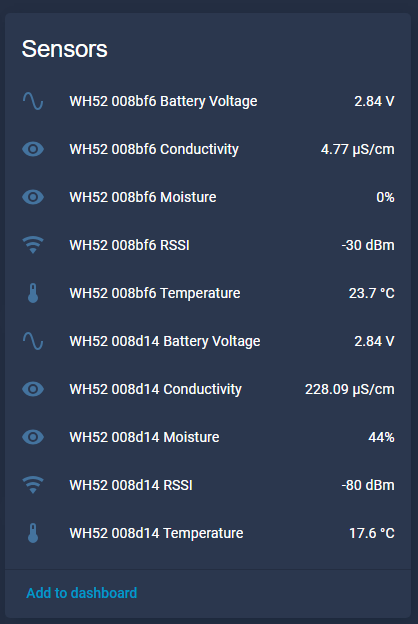
Home Assistant ends up with exactly ten entities, five per sensor:
| Entity | Unit |
|---|---|
| Moisture | % |
| Temperature | °C |
| Conductivity | µS/cm |
| Battery voltage | V |
| RSSI | dBm |
Both sensors currently report 2.84 V and receive data normally. One cosmetic detail remains: conductivity still shows five decimals. Changing both accuracy_decimals: 5 entries to accuracy_decimals: 2 gives a cleaner 5.27 µS/cm.
How does the entity list looks like in Home Assistant?
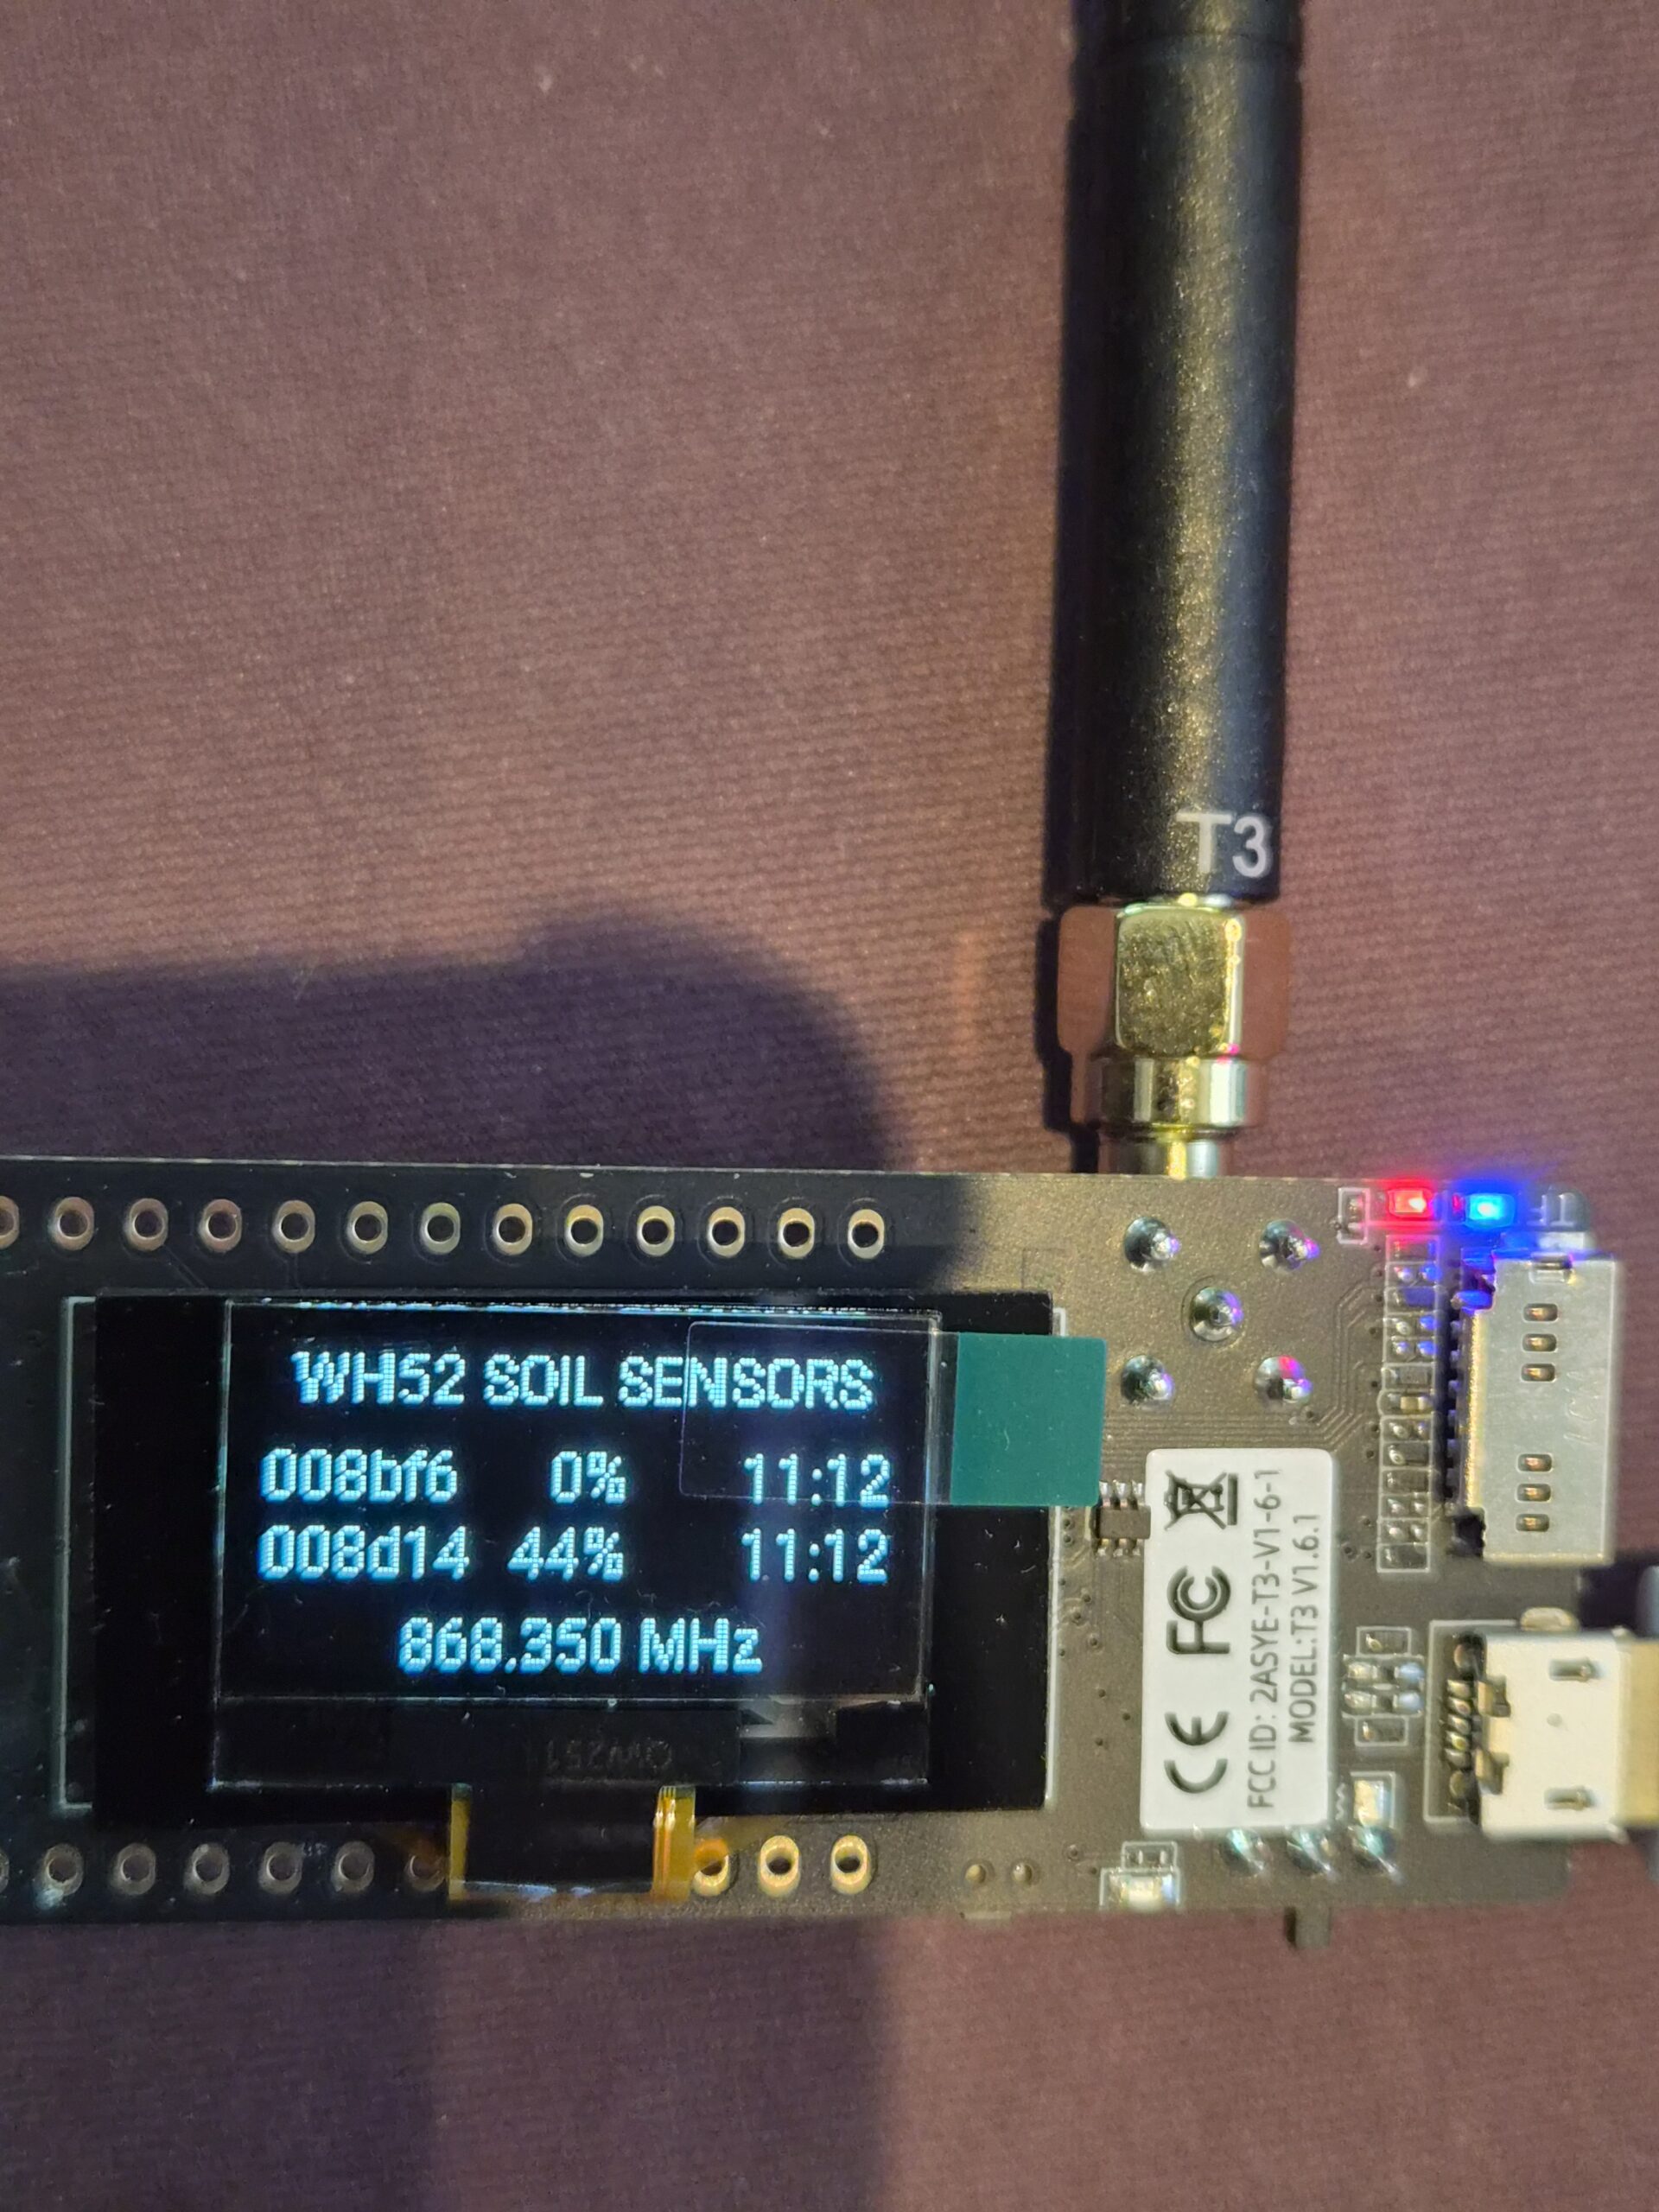
What is shown on the OLED display from the Lilygo board?
From left to right:
WH52 sensor ID >> Soil moisture >> Time of update (11:11)
One sensor is installed in the soil, the other one is dry on my desk here.
What I ran into
- YAML validation errors. An earlier design had extra
_rawsensors. After I removed them from the YAML, the old schema in__init__.pystill required them, so the config failed validation. Cleaning up the schema fixed it. - Loop time warnings. ESPHome logs that
rtl433_sx1276took longer than its limit for an operation. I saw 72 ms against a 50 ms limit, 89 ms against 80 ms, and one spike of 2784 ms. It is worth watching. - Duplicate decodes. The same packet is sometimes decoded twice in a row. It is harmless, but it is visible in the log.
Adding a third sensor
The IDs are hard-coded, so a third WH52 means touching four places:
- In
__init__.py, add constants and schema entries for its five sensors. - In the header, add the sensor members and setters.
- In the callback, add another ID branch.
- In the YAML, add the new entries.
Conclusion
OpenMQTTGateway got me data quickly and proved that the radio and sensors worked. The ESPHome version is the one I keep: clean entities, an encrypted connection, and a status display on the board itself. These readings now feed my irrigation project.