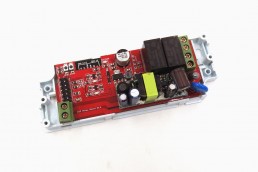
In preparation of my new irrigation system, I’ve purchased a Waveshare ESP32-S3-POE-ETH-8DI-8RO-C(PoE Network Port), Industrial 8-Ch ESP32-S3 WiFi Relay Module. This will be the heart of the irrigation system and will control the water valves and I’ll have the ability to restart some devices that might not have a direct integration in Home Assistant. Restarting here means switching a power socket, which cycles the power supply for that specific device.
For an earlier project at my fish pond, I’m using a Waveshare as well, but just with 6 channels, for power adapters for the pond filter box pump, the UV light, a fountain pump and to power some ESP Home devices as well.
The Waveshare this article is about, has several connections like Wifi, Ethernet/PoE, Bluetooth, and USB-C. I’m going to use USB-C to flash ESPHome onto it. This makes the controlling of it so much easier within Home Assistant, since all relays become visible as entities.
This article will show you how to flash ESPHome onto it, so it be be used within Home Assistant.
Below an illustration form the device.

I assume ESPHome is up and running within your Home Assistant instance and you know how to use this. Let me walk you through the steps to make this device running in ESPHome.
ESPHome Device Builder
First we are adding a new device here, prepare the yaml code for the firmware.
In ESPHome Device Builder, Create a new Device and in the popup Create a new Project.

Search for the right board, in this case “esp32s3” as shown below:

Press Select
Setup a name for this device and press Finish.

This will open the Yaml editor for this device. You’ll see a unique encryption key as well, which will be asked once you add this device to Home assistant.

Copy the api block temporary elsewhere, like in Notepad. I do the same for the ESPHome block. The reason for this is that we need more yaml code to be able to get the Waveshare up and running.
On the esphome.io website, a lot of projects, and yaml code is available. The next one might be an option for our project: https://devices.esphome.io/devices/waveshare-esp32-s3-eth-8di-8ro/
I’ve asked an AI agent to generate the yaml for me, based on my personal preferences I want to have in such config file, like the Wifi setup, where I use always a static IP address. Important to know for ESPHome is that only one network protocol can be enabled. Wifi or Ethernet. I’ve chosen for Wifi. My full yaml code will be available as attachment at the bottom of this post. Be aware the API key needs to be changed by you.
I save the yaml code at the bottom right corner and click on the 3 dots to validate the code. Please validate at all time, since this will save you time if something is not working well.

At the bottom, ideally you’d see “Valid” and then you can close the popup.
Next step is Click Install. It will ask you how the device is connected to your homelab. In my case I use an USB cable to connect the Waveshare directly into my local pc where I’m currently working on. I’ll choose “Plug into my local computer“.


It will start compiling the code and prepare the firmware. Be aware that this make take some time. Two minutes is common time. Be patient until it shows the next popup.

Click on “Connect & Install” and select the com port your device is on and click on Connect.

Once the firmware is flashed on the Waveshare, you’ll see the progress like below:

Once flashing is finished, it will open immediately the logs for the device. From that moment any other popup within ESPHome Builder can be closed.

For my purpose the device logging is just a confirmation the it’s connecting to the correct Wifi network, get’s it Ip address (192.168.20.22) and no errors are visible. Since the yaml code is is not using this logging to push information to while the device is operation, I can close this popup.
Adding device to Home Assistant
Go back to the ESPHome Device Builder main screen, where all your ESPHome devices are shown, maybe just your first one, this one. You will see your device is “Online”:

Now it’s time to add the device to ESPHome within Home Assistant.
In HA, go to Settings – Devices & Integrations – Open ESPHome:

Click on Add Device in the top right corner and add it’s IP address. In my case it’s a static IP 192.168.20.22 we saw earlier in the logging, in your case it might be dynamic, so your router will give its assigned IP address. Port 6053 can be untouched.

Once it’s added you can open the device with it’s entities and test the relays, the LED button, just make sure everything is working as expected before you move it to its final physical location.

I always enable the Firmware entity as well, so once ESPHome gets an update, all my ESPHome devices will get the new ESPHome software as well.
Click on the disabled entity and select Enable and save with OK. You’ll see a small popup that’s enabled. It will take 10-20 seconds before the entity becomes active.

Below the Controls for the 8 relays and the option to enable or disable the LED light on the Waveshare. Once a relay is turned on, a green built-in led will lighten up for that specific relay as well.

There is no option on the Waveshare to control the relays physically on the device. Just in case I need quick intervention and don’t have my phone around I’ll probably use a Zigbee wireless switch to control all it’s relays. Although you only see 4 options to turn something on, you can use this in scenes as well (1x short press, ling press, etc), In this case more than 4 relays can be switched on and off.

Attachments