My Setup
Before diving into the steps, here is a quick overview of the setup used in this guide.
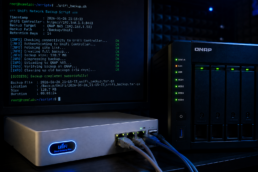
Device: QNAP TS-253D
Firmware: QTS 5.2.9.3451
RAM: 32GB (the TS-253D supports up to 32GB, so this unit is fully maxed out)
Role: The NAS handles several critical services simultaneously, including Home Assistant backups (synced directly via SMB), a Samba file share used as a network drive on Windows, and general NAS storage duties. It also runs QBoost and several other QNAP apps in the background.
Because the NAS is always on and running multiple services, memory tends to fill up over time with cached data that is no longer needed. Scheduling a daily memory optimization at 3:00 AM — when the system is at its quietest — keeps things running smoothly without any manual effort.
If you own a QNAP NAS, you may already know that QBoost can free up unused cached memory with a single click. However, what many users don’t realize is that there is no built-in scheduler for this feature. In this guide, you will learn how to automate QBoost memory optimization on your QNAP NAS using crontab, so it runs every day without any manual intervention.
Why Schedule Memory Optimization?
Over time, Linux-based systems like QTS accumulate cached memory that is no longer actively needed. While the OS reclaims this memory when required, proactively clearing it during off-peak hours — such as 3:00 AM — keeps your NAS running smoothly, especially if you run multiple apps and services simultaneously.
What You Will Need
- A QNAP NAS running QTS 4.4.1 or above
- SSH access enabled on the NAS
- An admin account (or a user with sudo privileges)
Step 1 — Enable SSH and Connect
First, make sure SSH is enabled on your NAS. Go to Control Panel → Network & File Services → Telnet/SSH and enable the SSH service.
By default, only the admin account has SSH access. However, you can grant additional users SSH access from the same screen. Click Edit Access Permission and check the box next to any user you want to allow. Note that while non-admin users can connect via SSH, they will not be able to run crontab commands without sudo or admin privileges — so make sure at least one admin account is enabled.
Then connect from your computer:
ssh admin@YOUR-NAS-IPReplace YOUR-NAS-IP with the local IP address of your QNAP.
Step 2 — Open the Persistent Crontab File
On QNAP, you must edit /etc/config/crontab directly rather than using crontab -e. This is because the standard crontab gets overwritten on every reboot. Editing the config file ensures your scheduled job survives restarts.
vi /etc/config/crontab
Step 3 — Add the Memory Optimization Job
Navigate to the end of the file, press i to enter insert mode, and add the following line:
0 3 * * * /bin/echo 1 > /proc/sys/vm/drop_cachesThis tells the system to run the memory optimization command every day at 3:00 AM. The command writes a 1 to the kernel’s drop_caches interface, which releases unused page cache, dentries, and inodes — exactly what QBoost does when you click Optimize manually.
Press Esc, then type :wq and hit Enter to save and exit.
Step 4 — Reload the Crontab
Run the following command to apply your changes and restart the cron daemon:
crontab /etc/config/crontab && /etc/init.d/crond.sh restartYou will see some output as the daemon restarts. Any SNMP-related warnings can safely be ignored — these are normal on QNAP.
Step 5 — Verify
Confirm your job was added successfully:
crontab -lYou should see your new line at the bottom of the list.
Customizing the Schedule
The cron syntax 0 3 * * * means “every day at 3:00 AM”. You can adjust this to suit your needs:
| Schedule | Cron expression |
|---|---|
| Every day at 3:00 AM | 0 3 * * * |
| Every 6 hours | 0 */6 * * * |
| Every Sunday at 2:00 AM | 0 2 * * 0 |
| Every day at midnight | 0 0 * * * |
Conclusion
By adding a single line to your QNAP crontab, you can automate memory optimization and keep your NAS performing at its best — without ever having to open QBoost manually. As a result, your system benefits from regular memory housekeeping during the quietest hours of the day.


Related Posts

Google Coral USB Slow in Frigate? My USB Cable Was the Bottleneck
A slow USB cable kept my Coral at USB 2…





Install ESPHome on a Waveshare ESP32-S3-POE-ETH-8DI-8RO-C WiFi Relay Module
Flashing ESPHome onto a Waveshare…
The Hardware Behind My Smart Garden Irrigation System
A look at the hardware going into my…