
Days of experimenting, a lot of raw pulse logs, and eventually a protocol decoder — but not yet a working remote clone. Here’s the full story.
Like many Home Assistant enthusiasts, I wanted to integrate my QazQa ceiling fan into Home Assistant. The fan comes with a small 433MHz remote offering:
- Fan ON/OFF
- Speed 1–5
- Light ON/OFF
- Forward / Reverse
QazQa doesn’t publish RF codes anywhere, and there’s no existing Home Assistant integration for it. Since the remote uses plain 433MHz RF rather than WiFi or Zigbee, my first thought was: “This should be easy, ESPHome supports RF transmitters and receivers.” It wasn’t. This is the full account, including the dead ends — because most of what I actually learned came from the parts that didn’t work.
By the end, I have working proof of exactly what the remote transmits, two independently-derived theories about how the protocol encodes each button, a fully built Home Assistant control interface — and one still-unsolved problem: getting the fan to actually respond to what I transmit back at it. I’ll walk through it in the order it happened.
What we actually proved, in case you stop reading here
- The original remote and the fan’s receiver both work exactly as expected — confirmed via RSSI and clean raw captures.
- Cheap generic 433MHz ASK receiver modules are not good enough for reverse-engineering an unknown protocol — they drown the real signal in noise.
- A CC1101-based transceiver can receive and cleanly decode the protocol, with the right squelch and timing settings.
- The protocol has been reverse-engineered into a fixed, repeatable set of per-button codes — twice, independently, using two different decoding approaches.
- Reproducing the exact RF waveform on transmit is a meaningfully harder problem than decoding it on receive — and that gap is where the project currently stands.
First attempt: Atom S3 Lite, SYN115, and a generic RF433R receiver
The first hardware combination I tried was a simple transmitter/receiver pair, no SPI radio chip involved:
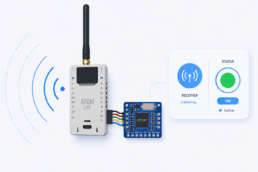
- Transmitter: M5Stack Atom S3 Lite + SYN115 ASK transmitter module
- Receiver: M5Stack Atom Lite (ESP32) + a generic RF433R receiver module
| SYN115 | Atom S3 Lite |
|---|---|
| VCC | 5V |
| GND | GND |
| DATA | GPIO2 |
| RF433R | Atom Lite |
|---|---|
| VCC | 5V |
| GND | GND |
| DATA | GPIO32 |
ESPHome makes receiving 433MHz signals look deceptively simple:
remote_receiver:
pin: GPIO32
filter: 500us
idle: 15ms
dump:
- raw
Result: nothing. No packets whatsoever, no matter which remote button I pressed.
Debugging the silence
The obvious suspects, in order: wrong GPIO, a damaged receiver, a damaged transmitter, a bad antenna, insufficient voltage. I worked through all of them.
First, I wanted to rule out the ESP32 itself. A simple GPIO toggle test (HIGH/LOW/HIGH/LOW) confirmed with a multimeter that the Atom S3 Lite could reliably drive its output pin — so the microcontroller side was fine.
Next, I measured the SYN115’s DATA pin directly while “transmitting.” It never changed. Whatever the actual cause — the module itself, the wiring, the board, or a voltage mismatch — the SYN115 never produced RF that I could detect. After many hours of debugging, I couldn’t isolate the exact fault, and decided it was more productive to switch platforms than keep guessing.
Switching to a Wemos D1 mini
I moved the SYN115 to a Wemos D1 mini (ESP8266), reasoning that its much larger community and long history of RF433 projects would surface more working reference configs:
| Wemos D1 mini | SYN115 |
|---|---|
| 5V | VCC |
| GND | GND |
| D2 | DATA |
This worked electrically — but still no RF reached the fan.
Cheap RF receivers aren’t good enough for this
Separately, the generic RF433R receiver turned out to be a big part of the problem on the receive side too. Its raw output was almost pure noise, regardless of whether the remote was being pressed:
Received Raw:
260,-1413,313,-1183,
220,-536,
107,-167,
351,-100,
394,-138,
...
Nothing in there resembled a repeatable protocol. That was the point where it became clear that a simple ASK receiver module — fine for something like a doorbell, where you just need to detect that a signal arrived — isn’t precise enough to reverse-engineer an unknown protocol. You need a receiver that gives you clean, low-jitter timing, and ideally some way to filter out everything except the signal you actually care about.
Bringing in the CC1101
The turning point was replacing both the simple transmitter and simple receiver with a proper SPI-controlled radio chip: the Texas Instruments CC1101, on two inexpensive Ebyte E07-M1101D-SMA modules. Unlike the SYN115/RF433R pair, the CC1101 handles the actual 433.92MHz modulation itself in hardware, with configurable filtering, and reports signal strength (RSSI) directly — all useful for reverse-engineering an unknown signal rather than just consuming a known one.
ESPHome added native support for the CC1101 as a built-in component in version 2025.12.0, which meant I could work with a single clean YAML component instead of juggling separate transmitter and receiver modules and external libraries.
Wiring — Wemos D1 mini
| CC1101 Pin No. | CC1101 Item | D1 mini pin | GPIO |
|---|---|---|---|
| 1 | GND | GND | — |
| 2 | VCC | 3V3 | — |
| 3 | GDO0 | D1 | GPIO5 |
| 4 | CSN | D8 | GPIO15 |
| 5 | SCK | D5 | GPIO14 |
| 6 | MOSI | D7 | GPIO13 |
| 7 | MISO/GDO1 | D6 | GPIO12 |
| 8 | GDO2 | not connected | — |
GDO0 doubles as both the transmit and receive data line here, using ESPHome’s “single pin automatic mode switching” — the CC1101 flips between TX and RX on that one wire, keeping the GPIO count down on a board with limited pins.
Wiring — Atom Lite (used later, for cross-checking)
| CC1101 Pin No. | CC1101 Item | Atom Lite GPIO |
|---|---|---|
| 1 | GND | G |
| 2 | VCC | 3V3 |
| 3 | GDO0 | G26 |
| 4 | CSN | G22 |
| 5 | SCK | G19 |
| 6 | MOSI | G23 |
| 7 | MISO/GDO1 | G33 |
| 8 | GDO2 | not connected |
First problem: the CC1101 wasn’t even talking over SPI
On first boot, reading the chip’s identity registers over SPI returned:
PARTNUM = 0xFF
VERSION = 0x3C
Both of those are the “nothing is answering” values — not a real chip identity, just the SPI bus floating. The cause turned out to be an incorrect SPI pin assignment. Once the SCK/MISO/MOSI mapping above was corrected, the same read returned:
PARTNUM = 0x00
VERSION = 0x14
That’s a real CC1101 identifying itself correctly — SPI communication confirmed alive.
RSSI as a sanity check
Before trying to capture anything meaningful, I wanted a simple, unambiguous confirmation that the frequency and hardware were actually correct. Monitoring RSSI (received signal strength) gave exactly that:
- Idle, no button pressed: RSSI around −89 dBm (background noise floor)
- Pressing a remote button: RSSI jumps to around −23 dBm
That’s a clean, unambiguous signal well above the noise floor — solid proof the frequency was right, the receiver was working, and the remote was genuinely transmitting something the CC1101 could see clearly. Compared to the RF433R’s constant noise, this was night and day.
Capturing the raw waveform
With RSSI confirming a clean signal, the next step was dumping raw pulse timings while pressing each button, to see what the actual protocol looked like:
remote_receiver:
id: rx
pin:
number: D1
allow_other_uses: true
dump: raw
tolerance: 50%
filter: 300us
idle: 15ms
buffer_size: 10000b
Two settings turned out to matter a lot more than expected:
- idle controls how long the receiver waits for silence before it considers a transmission “done” and flushes the buffer. An initial attempt at 4ms was far too short — it kept splitting single button presses into multiple truncated log lines, right in the middle of the data that actually mattered. Raising it to 15ms captured full, unbroken transmissions.
- Squelch. Even with the CC1101, the 433.92MHz band was noisy — a steady stream of unrelated interference was showing up regardless of which button was pressed. The CC1101 ESPHome component supports carrier-sense squelch, which fixed this cleanly:
cc1101:
cs_pin: D8
gdo0_pin:
number: D1
allow_other_uses: true
frequency: 433.92MHz
modulation_type: ASK/OOK
rx_attenuation: 12dB
carrier_sense_above_threshold: true
carrier_sense_rel_thr: +10dB
With both settings in place, pressing a button produced a single clean burst per press, with the button held down repeating the same signal several times in a row.
What the pulses look like
Typical measured pulse lengths across the capture included short pulses around 270–320μs, longer ones around 860–910μs, and one consistently much longer pulse around 5.6ms that showed up repeatedly between packets — clearly some kind of frame separator.
Here’s an actual captured burst for Speed 1, holding the button close to the receiver:
860,-1505, 860,-1505, 860,-330, 860,-1505, 860,-330,
860,-2690, 860,-330, 860,-1505, 860,-330, 860
Positive numbers are the transmitter “on” (mark), negative numbers are “off” (space), both in microseconds.
Two different decoding theories
Here’s where the story splits into two parallel analyses of the same underlying data — and where I want to be upfront that they don’t fully agree with each other, which is itself an interesting result.
Theory 1: bit classification within the frame
One pass at the raw captures classified every pulse as short (s), long (l), or frame separator (S), and treated bit-pairs as binary digits — ls decoding to a 1 bit, sl decoding to a 0 bit. A Speed 1 frame, run through this scheme, produced the pulse-class sequence:
lssllssllslssllslsslsllslssllslsslslslslsllssllss
which decoded to the binary string 101011011001101100000101, or hex 0xAD9B05. Repeating this across every button produced a consistent picture: a shared 16-bit address of AD9B across every button, with only the last byte varying:
| Button | Code |
|---|---|
| Speed 1 | AD9B05 |
| Speed 2 | AD9B0A |
| Speed 3 | AD9B06 |
| Speed 4 | AD9B09 |
| Speed 5 | AD9B02 |
| Fan | AD9B03 |
| Light | AD9B0D |
| Forward/Reverse | AD9B0C |
This is a clean, classic remote-control structure — a fixed address identifying the specific fan/remote pairing, plus a small per-button command byte. If accurate, it would make this a fairly conventional fixed-code remote at heart, just with a slightly unusual bit encoding.
Theory 2: information encoded in the silence between repeats
A separate, later pass at fresh captures (holding buttons down long enough to get several repeats per press, with the receiver’s idle raised to 15ms so full multi-repeat bursts stayed intact) came to a different conclusion. Across every button captured this way, the mark length stayed rock solid at roughly 860μs, and the pulse pattern within a single frame was identical no matter which button was pressed — 10 marks, 9 spaces, always the same short/long structure.
What distinguished one button from another in this analysis was instead the silence between repeats. Holding a button down sends the same frame over and over, separated by a gap — and that gap duration clustered around a small set of values (roughly 5040μs, 6220μs, 7400μs, and 8580μs), with each button using a different pairing of two of those values:
- Speed 1: 6220μs, 6220μs
- Fan on/off: 7400μs, 6220μs
- Light on/off: 5045μs, 6220μs
- Speed 5: 7400μs, 7400μs
This is a fairly unusual way to encode a button on a cheap fixed-code remote — most designs put all the information into the pulse train itself, matching Theory 1 — but the gap pattern held up consistently across dozens of repeated captures, with no two buttons sharing the same gap signature.
Which one is right?
Honestly, I don’t know yet. It’s possible both are partially correct — that the chip encodes the button both in the pulse train and in repeat timing, for redundancy or error-checking, and each analysis happened to key in on one dimension. It’s also possible one of the two is simply a misread of the data. Untangling that properly is one of the concrete next steps, and worth doing before spending more time on transmit-side debugging — there’s not much point perfecting a waveform built on the wrong theory.
Building the Home Assistant control side
Regardless of which decoding theory is correct, ESPHome’s remote_transmitter component can replay a captured raw burst directly — no need to fully understand the encoding to attempt playback. A template switch handles the toggle-style buttons (fan power, light, direction), and a template select handles the five speed levels, each firing the matching raw code array:
switch:
- platform: template
name: "Fan Power"
optimistic: true
assumed_state: true
turn_on_action:
- remote_transmitter.transmit_raw:
code: [876,-1500,865,-1488, ...]
turn_off_action:
- remote_transmitter.transmit_raw:
code: [876,-1500,865,-1488, ...]
select:
- platform: template
name: "Fan Speed"
optimistic: true
options: ["1","2","3","4","5"]
set_action:
- if:
condition:
lambda: 'return x == "1";'
then:
- remote_transmitter.transmit_raw:
code: [860,-1520,837,-1502, ...]
Since the fan/light/direction buttons are simple toggles rather than distinct on/off codes, they’re marked assumed_state: true in Home Assistant — the same physical code is sent regardless of which position you tap, since that’s genuinely how the remote works.
The real challenge: transmit is not just receive in reverse
This is the part that turned into the most interesting technical detour, and the core lesson of the whole project. After wiring everything up on the D1 mini, the transmitted codes weren’t being recognized by the fan at all — not even a few centimeters away. Logs confirmed the CC1101 chip was initializing correctly, ESPHome was firing the transmit action, output power looked normal, and the antenna was properly attached. Nothing obviously wrong on the surface.
To actually verify what was leaving the antenna, I set up a second, completely independent CC1101 receiver on the Atom Lite, using the exact same capture settings that had worked earlier, and pointed it at the D1 mini during a transmit.
The result was informative: the general timing pattern was there and roughly matched the expected code, but scattered through the capture were pulses roughly double the expected mark length — classic signs of two adjacent pulses merging together because a brief transition was missed.
The likely explanation is that the ESP8266 doesn’t have dedicated timer hardware for this kind of precise bit-banged output — it’s toggling the GPIO in software, and background tasks (WiFi handling, in particular) can introduce just enough jitter to distort the signal. The ESP32, by contrast, has RMT (Remote Control Transceiver) hardware specifically built for this kind of precise pulse generation, which is what the CC1101 component leans on for accurate timing. So the current build uses the CC1101 wired to the Atom Lite (ESP32) instead, for the timing precision.
Even after that switch, transmission still isn’t reliably recognized by the fan, even at close range — despite the codes verifying byte-for-byte against the original captures, and the RF signal itself measuring cleanly on the independent sniffer. That tells me the remaining gap isn’t simple software jitter anymore. Other plausible culprits, roughly in order of how much control ESPHome’s stock components give over them:
- Asynchronous CC1101 TX configuration details not exposed at the YAML level
- GDO pin mode/timing during the TX/RX handoff
- Preamble differences between what the chip sends and what the fan’s receiver expects
- Sync word handling
- Exact pulse shaping / edge timing at the RF level
- Fine modulation timing (deviation, symbol rate) beyond what raw OOK bit-banging controls
- Packet framing assumptions baked into the receiver chip on the fan side
In short: decoded bits are not the same thing as an exact, reproducible RF waveform. Getting a receiver to tell you what a signal contains is a much lower bar than getting a transmitter to reproduce that signal precisely enough for another receiver to accept it as valid.
Lessons learned
ESPHome is excellent for experimentation — the native CC1101 component in particular made this whole project far more approachable than juggling separate transmitter/receiver modules and external libraries would have been.
Cheap generic RF433 modules are fine for something like a doorbell, where you just need to know a signal arrived. They are not suitable for reverse-engineering an unknown protocol — the noise floor and timing jitter make it nearly impossible to separate signal from garbage.
The CC1101 is absolutely worth the extra wiring complexity. Receive quality is outstanding, RSSI alone was enough to prove the protocol existed and the hardware was working, and the built-in squelch options made clean captures achievable.
RF reverse engineering is harder than it looks from the outside. Receiving is genuinely the easy half. Reproducing a signal precisely enough that a different receiver chip accepts it as valid is where the real challenge lives.
Current status
- ✅ CC1101 receiver working, confirmed via RSSI and clean raw captures
- ✅ Protocol partially decoded, via two independent methods
- ✅ All eight button codes captured and repeatable
- ✅ Multiple identical frames verified per button, across many capture sessions
- ✅ Home Assistant control entities (switches + speed select) built and wired to transmit
- ❌ RF transmission not yet reliably recognized by the fan, even at close range
- ❌ The two decoding theories haven’t been reconciled against each other
What’s next
The next concrete step is cross-validating the two decoding theories against the same raw dataset, ideally with a small script rather than manual pulse-counting, to settle whether the button identity lives in the pulse train, the repeat timing, or some combination of both. In parallel, verifying the transmitted waveform from the CC1101 against the original remote’s waveform — pulse for pulse, not just in decoded bits — using a second CC1101 as a reference receiver remains the most direct path to finding the gap. Once the transmitted signal matches the original closely enough for the fan’s receiver to accept it, the final step is simply wiring that up cleanly in Home Assistant — which, given the switch/select scaffolding already built, is the easy part by comparison.
Update: a promising lead from a similar project
After publishing this, I came across a write-up from someone who reverse-engineered a comparable 433MHz protocol — in their case, for Campa/Noirot electric radiator RF control cassettes — using the same CC1101 + ESP32 + ESPHome approach described here. Their project reached a working result, and a few details from it are directly relevant to where this one is stuck:
- They used an RTL-SDR dongle with Universal Radio Hacker (URH) to inspect the signal at the spectrum level, rather than relying only on a second receiver board — real SDR tooling gives visibility this project hasn’t had yet.
- They identified their protocol as Manchester II encoded — a specific, well-defined scheme worth testing our own captures against directly, which could settle the open question between the two decoding theories above.
- Most usefully: they note the CC1101’s internal crystal has a frequency offset/drift, and recommend either an external crystal or manually correcting the frequency registers to compensate. This fits our exact symptoms — our receiver picks up the original remote fine, and our own CC1101-to-CC1101 sniffer test looked broadly correct, but the fan’s receiver, tuned tightly to the original transmitter, could simply be rejecting a signal that’s slightly off-frequency. It’s a more mundane explanation than preamble or sync-word mismatches, and cheaper to test first.
An RTL-SDR dongle and a look at the CC1101 component’s frequency calibration options are now top of the list for the next session on this.
Final thoughts
What looked at the outset like a simple “433MHz remote clone” turned into a genuine deep dive into RF engineering — modulation, timing analysis, SPI communication, squelch tuning, and signal decoding. The fan isn’t controlled from Home Assistant yet, but the distance travelled is real: from knowing nothing about the protocol, to having a documented, repeatable, mostly-decoded understanding of exactly how the remote communicates with the fan, plus a fully built control interface waiting for the last piece to click into place.
If you’re attempting something similar with a CC1101 and an unsupported 433MHz remote, I hope this saves you some of the trial and error — and if you figure out the transmit side before I do, I’d genuinely love to hear about it.
Related Posts
May 30, 2026
Monitor QNAP Updates in Home Assistant
May 28, 2026
Monitor WordPress Updates in Home Assistant
October 20, 2025
NED Energy Dashboard in Home Assistant
October 30, 2024
Bye Bye Homeseer…..Welcome Home Assistant!
November 8, 2019
Monitor road temperatures (country NL only)
September 28, 2019
Shelly Wall Plug-S integration in Homeseer
May 15, 2019
Control a Windows Service from a vb.NET script
December 5, 2018
Monitor your “The Things Network” Gateway
November 4, 2018
ElectroDragon – Wifi IoT Relay Board firmware change to Espeasy
November 3, 2018
Sagemcom-T210D P1 Smartmeter reading in Homeseer
September 2, 2018
Denon HEOS multiroom speaker script integration in Homeseer
August 19, 2018
The Things Network – 8 channel LoRa gateway on Raspberry Pi
May 13, 2018
GPS data from Traccar in Homeseer
March 3, 2018
Google Assistent soon available in Dutch language
March 2, 2018
Fitbit Aria body weight scale
January 22, 2018
Prepare HA system for move
December 31, 2017
Measure traffic duration and distance between multiple addresses
November 11, 2017
Nice Youtube review of the LITEdge smart plug (by skiwithpete)
September 7, 2017
Get Fibaro FGD-212 dimmer working in Homeseer
August 20, 2017
Buienradar (NL) precipitation/rain forecast PHP script
August 2, 2017
From HSTouch to realtime responsive dashboard
July 21, 2017
Uncode: my new WordPress theme
June 13, 2017
BlueIris and Homeseer
May 13, 2017
Garden sprinklers
March 14, 2017
Sonoff GPIO input
March 4, 2017
Amazon Echo Dot voice/speech integration
February 2, 2017
Sonoff firmware tutorial to ESP easy
October 9, 2016
Air quality CO2 monitor
June 11, 2016
Mailbox sensor
June 4, 2016
Fibaro Flood sensor
March 13, 2016
Store Homeseer device parameters into MySQL
February 22, 2016
Control Raspberry Pi relays with Homeseer
February 19, 2016
New IP camera in back garden
February 16, 2016
Retrieve current Spotify track data into Homeseer
February 13, 2016
Control Spotify from Homeseer via Tasker
January 14, 2016
Sensative Z-Wave Plus door/window sensor
October 2, 2015
New GPS tracker TK103-2
October 2, 2015
220V powered Fibaro motion sensor FGMS-001
December 10, 2014
GPS Tracker TK104
November 29, 2014
ClearOne XAP 800 Microphone Mixer
November 15, 2014
Upgrade to Homeseer 3
September 25, 2014